مرحبًا بك في دليل البدء السريع لسولانا! سيقدم لك هذا الدليل العملي تعريفًا بـ منصة سولانا التفاعلية (Solpg)، حيث يمكنك تعلم المفاهيم الأساسية، بغض النظر عن خبرتك السابقة. في هذا البرنامج التعليمي، ستتعلم عن:
- حسابات سولانا: كيف تخزن شبكة سولانا البيانات
- إرسال المعاملات: كيفية التفاعل مع شبكة سولانا عن طريق إرسال المعاملات
- بناء ونشر البرامج: إنشاء برنامجك الأول على سولانا ونشره على الشبكة
- العناوين المشتقة من البرامج: تعلم كيفية إنشاء عناوين محددة للحسابات
- استدعاءات البرامج المتقاطعة: تعلم كيفية استدعاء برامج أخرى من داخل برنامجك، مما يتيح التفاعلات المعقدة وقابلية تركيب البرامج
منصة سولانا التفاعلية
منصة سولانا التفاعلية هي بيئة تطوير تعمل على المتصفح تتيح لك تطوير ونشر واختبار برامج سولانا دون الحاجة إلى تثبيت أي شيء محليًا. تابع معنا، انسخ والصق الكود، وشاهد النتائج فورًا. المعرفة الأساسية بالبرمجة مفيدة ولكنها ليست ضرورية. حان الوقت للغوص والبدء في البناء مع سولانا!
كمستخدم جديد، الخطوة الأولى للتفاعل مع منصة سولانا التفاعلية هي إنشاء محفظة خاصة بالمنصة وإضافة SOL. ستتيح لك هذه المحفظة التفاعل مع شبكة سولانا مباشرة من متصفحك.
إنشاء محفظة بلايجراوند
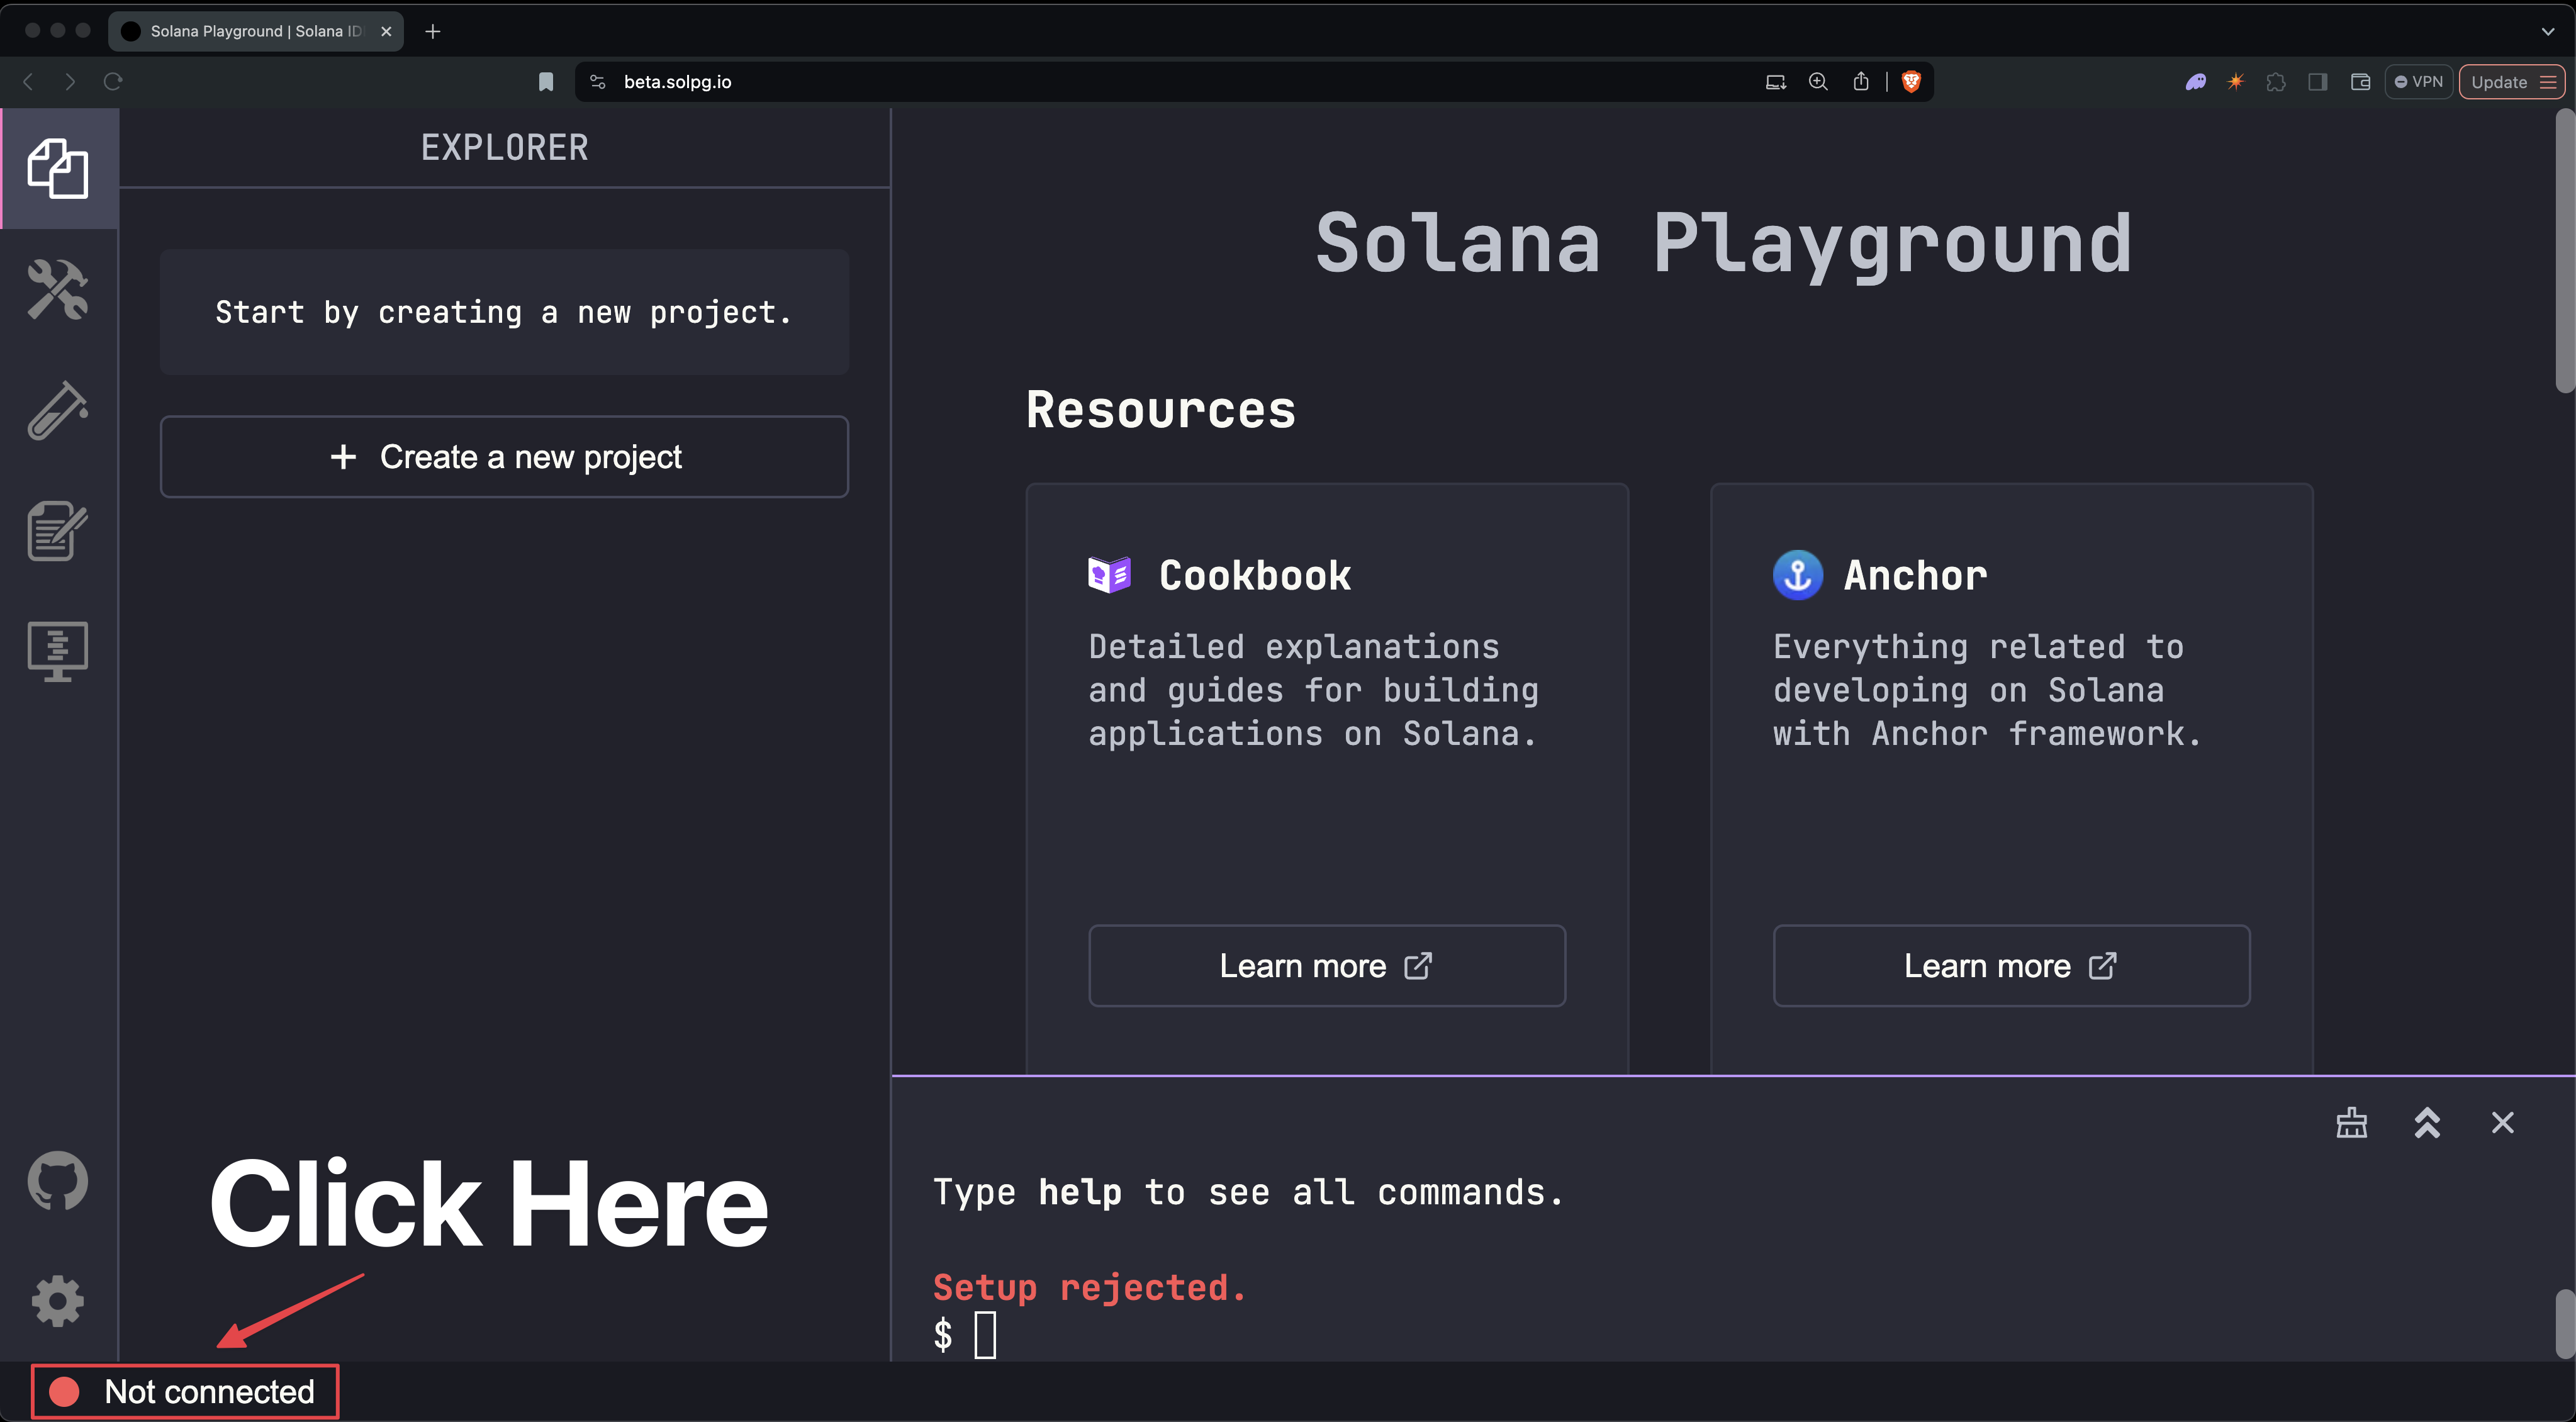
انتقل إلى منصة سولانا التفاعلية
باستخدام متصفح الويب الخاص بك، انتقل إلى منصة سولانا التفاعلية.
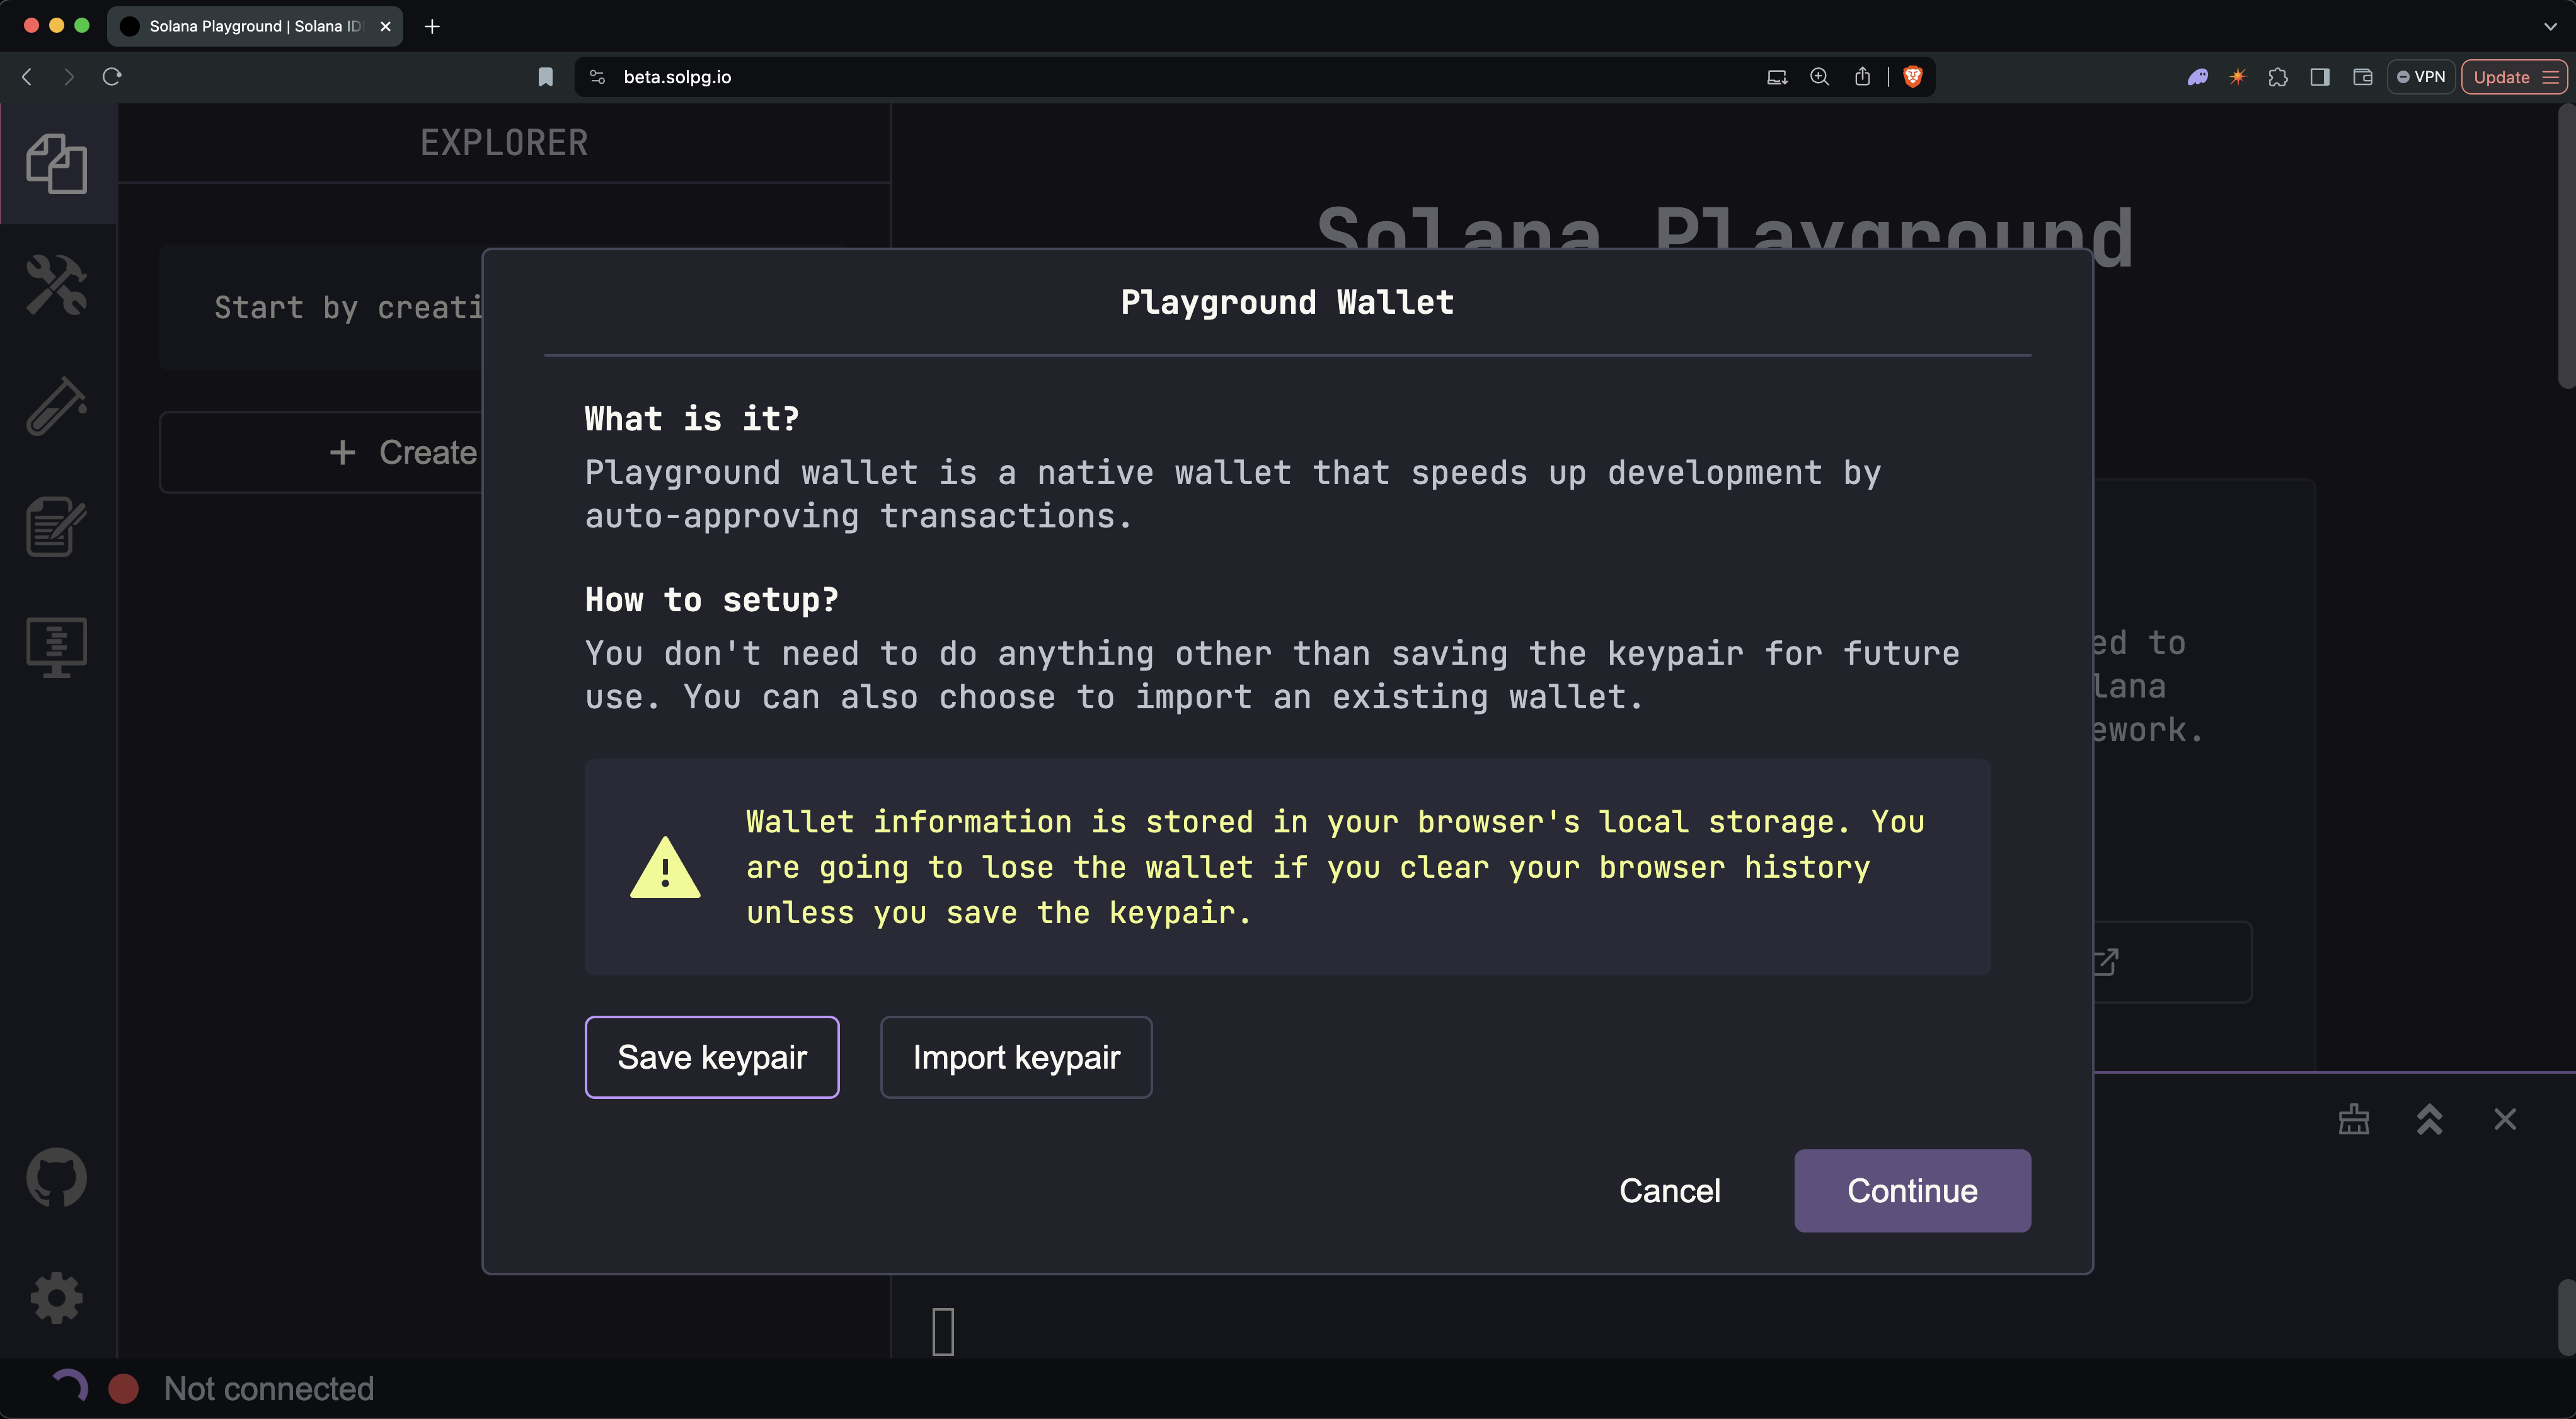
احفظ زوج المفاتيح الخاص بك
انقر على حفظ زوج المفاتيح لحفظ زوج المفاتيح الخاص بك محليًا. عندما تكون جاهزًا، انقر على متابعة.
 إنشاء محفظة بلايجراوند
في أسفل الشاشة، سترى أنك متصل الآن بمحفظة Playground. سترى أيضًا
الكتلة المتصلة (devnet)،
وعنوان المحفظة، ورصيدك من
SOL.
 متصل
متصل
يحفظ التخزين المحلي لمتصفحك محفظة بلايجراوند الخاصة بك. سيؤدي مسح ذاكرة التخزين المؤقت للمتصفح إلى إزالة محفظتك المحفوظة.
استخدم محفظة Playground للاختبار والتطوير فقط. لا ترسل أبدًا أصولًا حقيقية (من
mainnet) إلى هذا العنوان.
تهانينا! لقد أنشأت أول محفظة سولانا خاصة بك. أنت الآن جاهز لإضافة SOL إلى محفظتك.
أضف SOL إلى محفظتك
قبل بدء التطوير، تحتاج إلى إضافة SOL على شبكة devnet إلى محفظتك. كمطور، يُستخدم SOL لحالتي استخدام رئيسيتين:
- لإنشاء حسابات جديدة لتخزين البيانات أو نشر البرامج
- دفع رسوم المعاملات عند التفاعل مع شبكة سولانا
يمكنك إضافة SOL على شبكة devnet إلى محفظتك باستخدام طرفية بلايجراوند أو باستخدام صنبور Devnet. كل خيار موضح أدناه:
الخيار الأول: استخدام طرفية بلايجراوند
قم بتشغيل الأمر التالي في طرفية بلايجراوند:
$solana airdrop 5
الخيار الثاني: استخدام صنبور ديفنت
إذا فشل الخيار 1، بسبب حدود معدل الاستخدام أو أخطاء أخرى، استخدم صنبور الويب الخاص بسولانا.
- أدخل عنوان محفظتك
- اختر كمية
- انقر على تأكيد الإسقاط الجوي
 إسقاط جوي من الصنبور
Is this page helpful?