Costruisci, distribuisci e testa il tuo primo programma sulla blockchain Solana utilizzando il framework Anchor. Questa guida ti aiuterà a familiarizzare con Solana Playground e ti preparerà all'utilizzo dei Program Derived Address (PDA) e delle Cross Program Invocation (CPI).
Crea un progetto Anchor
- Apri Solana Playground nel tuo browser web
- Nel pannello di sinistra, clicca su + Crea un nuovo progetto
- Inserisci un Nome progetto
- Seleziona Anchor (Rust) come framework
- Clicca su Crea
 Nuovo Progetto
Il file sorgente src/lib.rs si aprirà. Contiene una struct chiamata
Initialize, che esegue le seguenti operazioni:
- Riceve un parametro obbligatorio chiamato
data: u64 - Crea un nuovo account
- Salva il valore di
data: u64nel nuovo account - Aggiunge un messaggio ai log del programma della transazione
use anchor_lang::prelude::*;// This is your program's public key and it will update// automatically when you build the project.declare_id!("11111111111111111111111111111111");#[program]mod hello_anchor {use super::*;pub fn initialize(ctx: Context<Initialize>, data: u64) -> Result<()> {ctx.accounts.new_account.data = data;msg!("Changed data to: {}!", data); // Message will show up in the tx logsOk(())}}#[derive(Accounts)]pub struct Initialize<'info> {// We must specify the space in order to initialize an account.// First 8 bytes are default account discriminator,// next 8 bytes come from NewAccount.data being type u64.// (u64 = 64 bits unsigned integer = 8 bytes)#[account(init,payer = signer,space = 8 + 8)]pub new_account: Account<'info, NewAccount>,#[account(mut)]pub signer: Signer<'info>,pub system_program: Program<'info, System>,}#[account]pub struct NewAccount {data: u64}
Compila e distribuisci il programma
- Compila il codice del programma
$build
Il tuo ID programma, definito in
declare_id!(), sarà ora aggiornato.
- Aggiungi SOL al tuo wallet (Opzionale)
Il deploy di un programma richiede SOL nel program account onchain. Se necessario, aggiungi SOL al tuo wallet prima di procedere allo step 3.
- Distribuisci il programma sulla rete
$deploy
Quando viene distribuito, il bytecode del programma viene memorizzato in un program account eseguibile.
Nota: Se preferisci, puoi utilizzare i pulsanti Build e Deploy nel pannello laterale sinistro, come mostrato nello screenshot qui sotto.
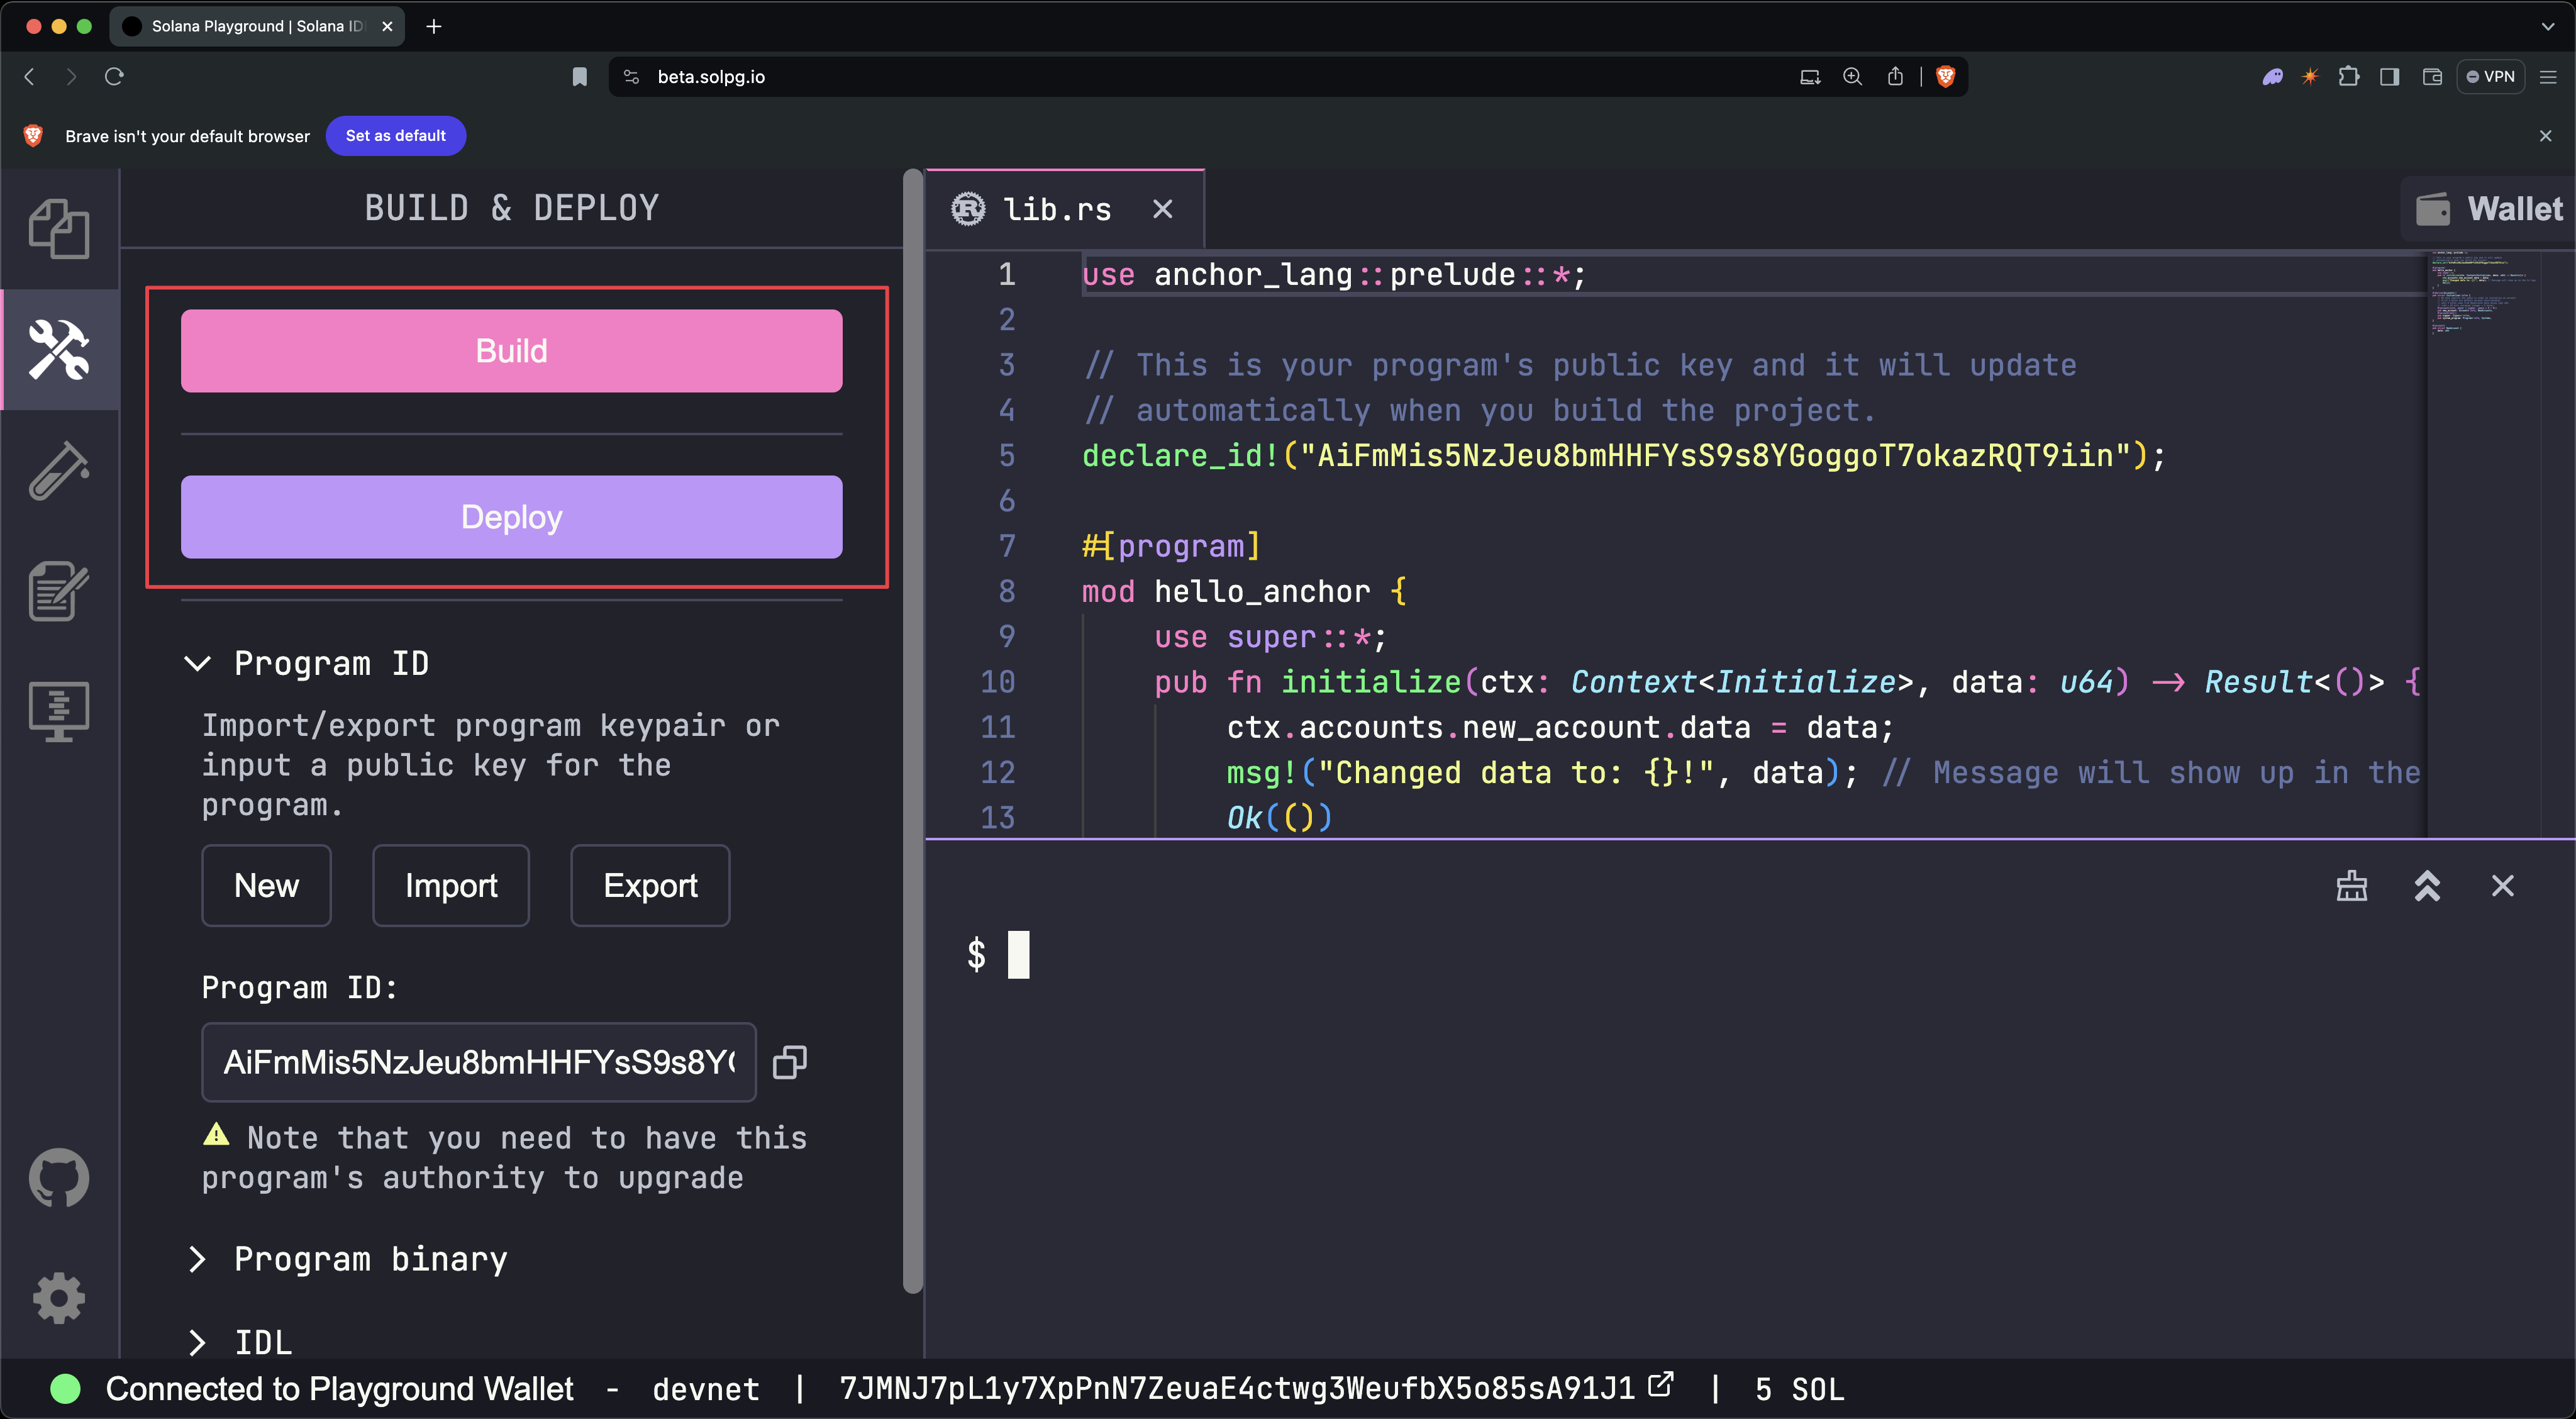 Build e Deploy
Testa il programma
- Apri il file di test chiamato
tests/anchor.test.ts. Questo file dimostra come invocare la structinitializedel programma dal client.
// No imports needed: web3, anchor, pg and more are globally availabledescribe("Test", () => {it("initialize", async () => {// Generate keypair for the new accountconst newAccountKp = new web3.Keypair();// Send transactionconst data = new BN(42);const txHash = await pg.program.methods.initialize(data).accounts({newAccount: newAccountKp.publicKey,signer: pg.wallet.publicKey,systemProgram: web3.SystemProgram.programId}).signers([newAccountKp]).rpc();console.log(`Use 'solana confirm -v ${txHash}' to see the logs`);// Confirm transactionawait pg.connection.confirmTransaction(txHash);// Fetch the created accountconst newAccount = await pg.program.account.newAccount.fetch(newAccountKp.publicKey);console.log("Onchain data is:", newAccount.data.toString());// Check whether the data onchain is equal to local 'data'assert(data.eq(newAccount.data));});});
- Esegui il file di test
$test
- Salva l'hash della transazione (
TxHash) incluso nell'output
(Nell'esempio sopra, l'hash della transazione è
3TewJtiUz1EgtT88pLJHvKFzqrzDNuHVi8CfD2mWmHEBAaMfC5NAaHdmr19qQYfTiBace6XUmADvR4Qrhe8gH5uc.)
Nota: Se preferisci, puoi usare il pulsante Test nel pannello laterale
sinistro.
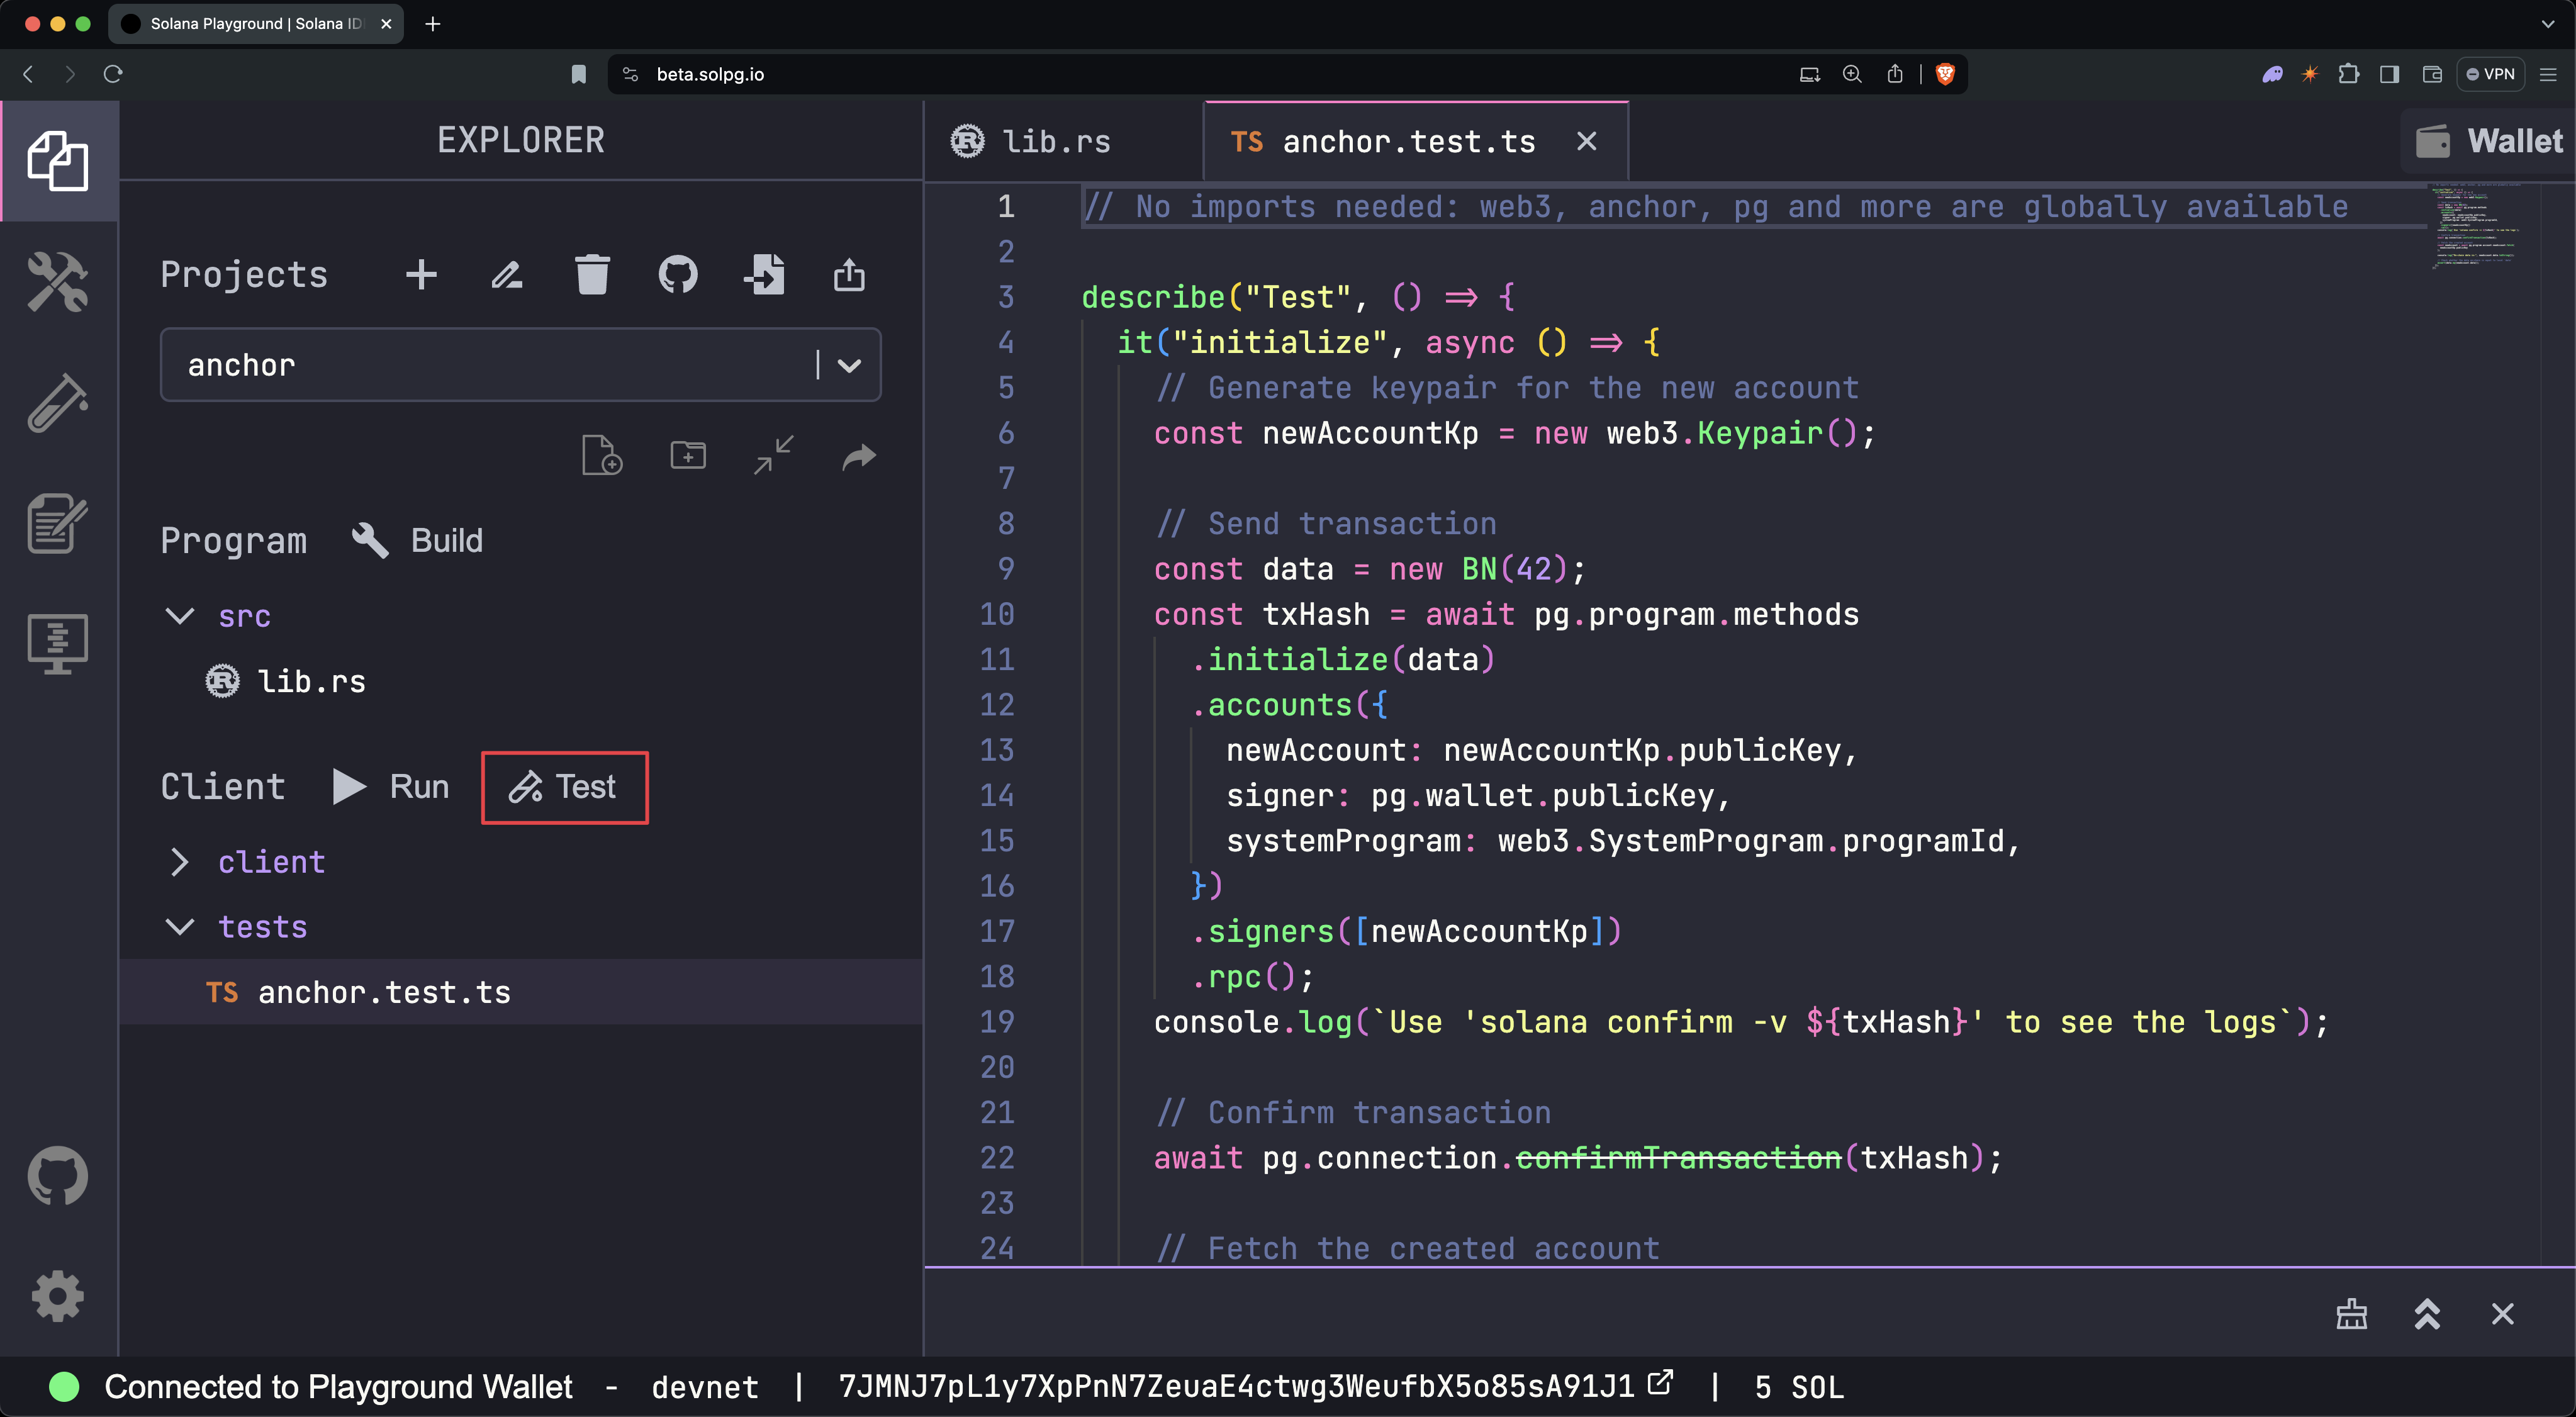 Esegui Test
- Esegui
solana confirm -v [TxHash]per visualizzare i log della transazione
$solana confirm -v 3TewJtiUz1EgtT88pLJHvKFzqrzDNuHVi8CfD2mWmHEBAaMfC5NAaHdmr19qQYfTiBace6XUmADvR4Qrhe8gH5uc
- Visualizza i dettagli della transazione
Apri SolanaFM oppure Solana Explorer e cerca l'hash della transazione.
Solana Explorer: Imposta il cluster di rete su devnet, per corrispondere
a quello di Solana Playground.
Chiudi il programma
Chiudi il programma per recuperare i SOL allocati al programma onchain. Per
farlo, esegui solana program close [ProgramID], utilizzando l'indirizzo del
programma memorizzato nella macro declare_id!().
$solana program close 2VvQ11q8xrn5tkPNyeraRsPaATdiPx8weLAD8aD4dn2r
I programmi possono essere solo chiusi o aggiornati da un account con autorità di aggiornamento. Il tuo wallet Playground diventa automaticamente l'autorità di aggiornamento per ogni programma quando viene distribuito. Se l'autorità di aggiornamento viene revocata, il programma diventa immutabile.
Congratulazioni! Hai creato e distribuito il tuo primo programma Solana utilizzando Anchor.
Prossimi passi
Ora che hai distribuito il tuo primo programma, sei pronto per esplorare indirizzi derivati dal programma e invocazione tra programmi.
Is this page helpful?