How to Authenticate Users with Solana Wallets Using Supabase
1. Introduction
This guide shows you how to build a Solana app with wallet authentication using Supabase. Users sign in with their Phantom or Solflare wallet. No email. No passwords. Just a wallet signature.
You'll be working with the Supabase authentication template, which provides a complete starting point for Solana applications with wallet-based authentication.
Traditional authentication means managing user accounts, password resets, and email verification. With Solana wallet authentication, users prove they control a wallet address. That's it. It's simpler for them. It's simpler for you.
The template uses Supabase's wallet authentication. Supabase handles the cryptographic verification. You get a managed PostgreSQL database, session management, and protected routes. No local database setup. Everything runs through Supabase's hosted services.
This guide is based directly on the code in the template. Every code snippet comes from the actual implementation. Every file path is real. If you see something here, you can find it in the template.
What you'll learn:
- How to set up Supabase wallet authentication for Solana wallets
- How wallet connection works separately from Supabase authentication
- How to protect routes so only authenticated users can access them
- How the authentication flow works under the hood
By the end, you'll understand why each piece exists. You'll know how to extend it for your own needs. If you see an error message you don't recognize, don't stress. We'll cover the common ones and how to fix them.
2. What You'll Build
After following this guide, you'll have a working Next.js app with wallet authentication built from the Supabase authentication template. The app includes a home page with wallet connection, a protected account page, and a complete authentication system using Supabase.
3. Why This Matters
Building your own Solana authentication system requires handling message
signing, signature verification, session management, and database storage. This
template uses Supabase's wallet authentication, so you just call
supabase.auth.signInWithWeb3() and it works. With Solana wallet
authentication, users sign in with their wallet, no passwords, no email
verification, just one click.
4. Prerequisites
Before you start, make sure you have these installed. If you're missing something, the app won't run. Don't worry, we'll check each one.
Node.js v24 (LTS)
The template uses Next.js. It requires Node.js v24 (LTS) or later. Check your version:
node --version
If you see Node.js v24 or later, you're good. If not, install Node.js from nodejs.org. Use the LTS version. It's the most stable.
Next.js runs on Node.js. It handles server-side rendering, API routes, and the
build process. Without it, npm install won't work.
A Supabase account
You need a Supabase account to use wallet authentication. The free tier works fine for development. Sign up at supabase.com. It takes about two minutes.
The template uses Supabase's wallet authentication feature. You'll create a
project and get credentials. Those credentials go in your .env.local file.
Without them, authentication won't work.
You'll need two things from your Supabase project:
- Project URL (looks like
https://xxxxx.supabase.co) - Anon key (the public key, not the service role key)
You can find both in your Supabase dashboard under Settings → API. Don't stress if you don't have them yet. We'll get them during setup.
A Solana wallet extension
You need a Solana wallet installed in your browser. Phantom, Solflare, or Backpack all work. Install one from their official websites. Make sure it's the browser extension, not a mobile app.
Users sign in with their wallet. The template detects window.solana to
connect. Without a wallet extension, the "Connect Wallet" button won't work. You
can't test authentication without it.
Optional: A code editor
Use VS Code, Cursor, or any editor you prefer. The template uses TypeScript, so an editor with TypeScript support helps. But it's not required. You can use any text editor.
That's it. If you have Node.js v24 (LTS) or later, a Supabase account, and a Solana wallet, you're ready. If you're missing something, install it now. We'll wait.
5. Setting Up the Project
Follow these steps in order. If you skip a step, something will break. Don't worry, we'll check each step as we go.
- Create the project
Create a new project using the Supabase authentication template:
npx -y create-solana-dapp@latest -t solana-foundation/templates/community/supabase-auth
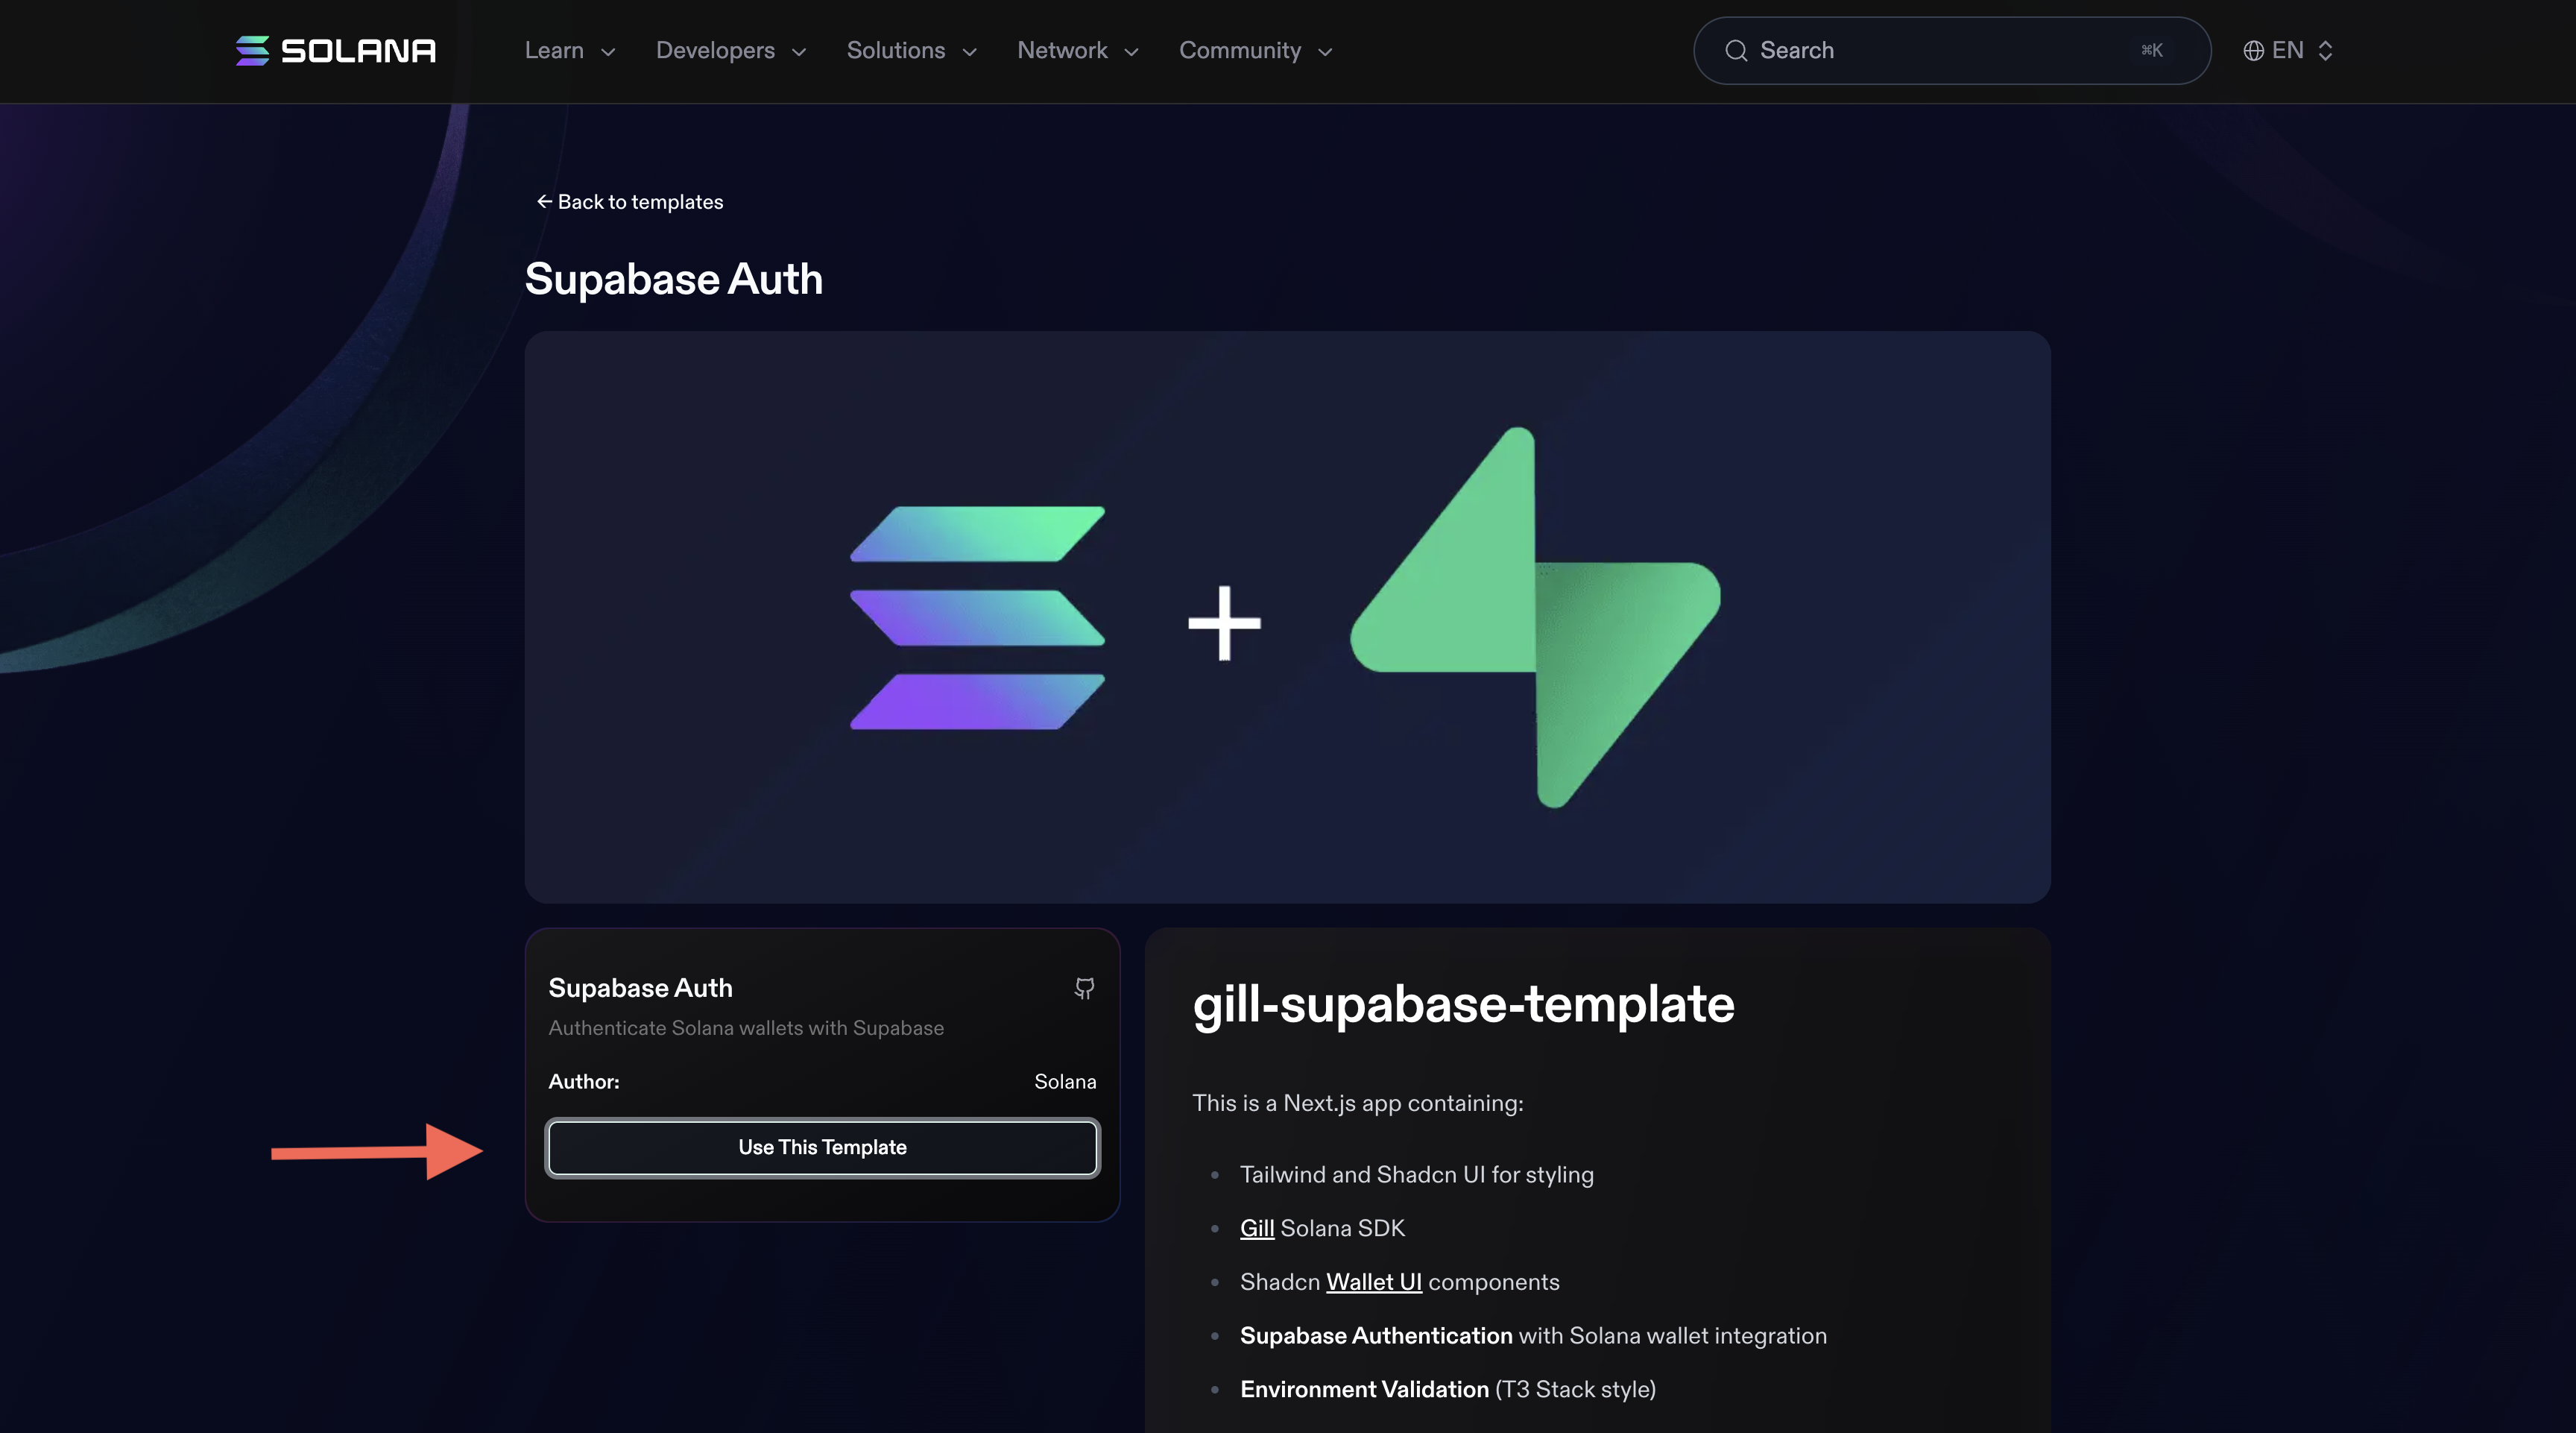 Click "Use This Template"
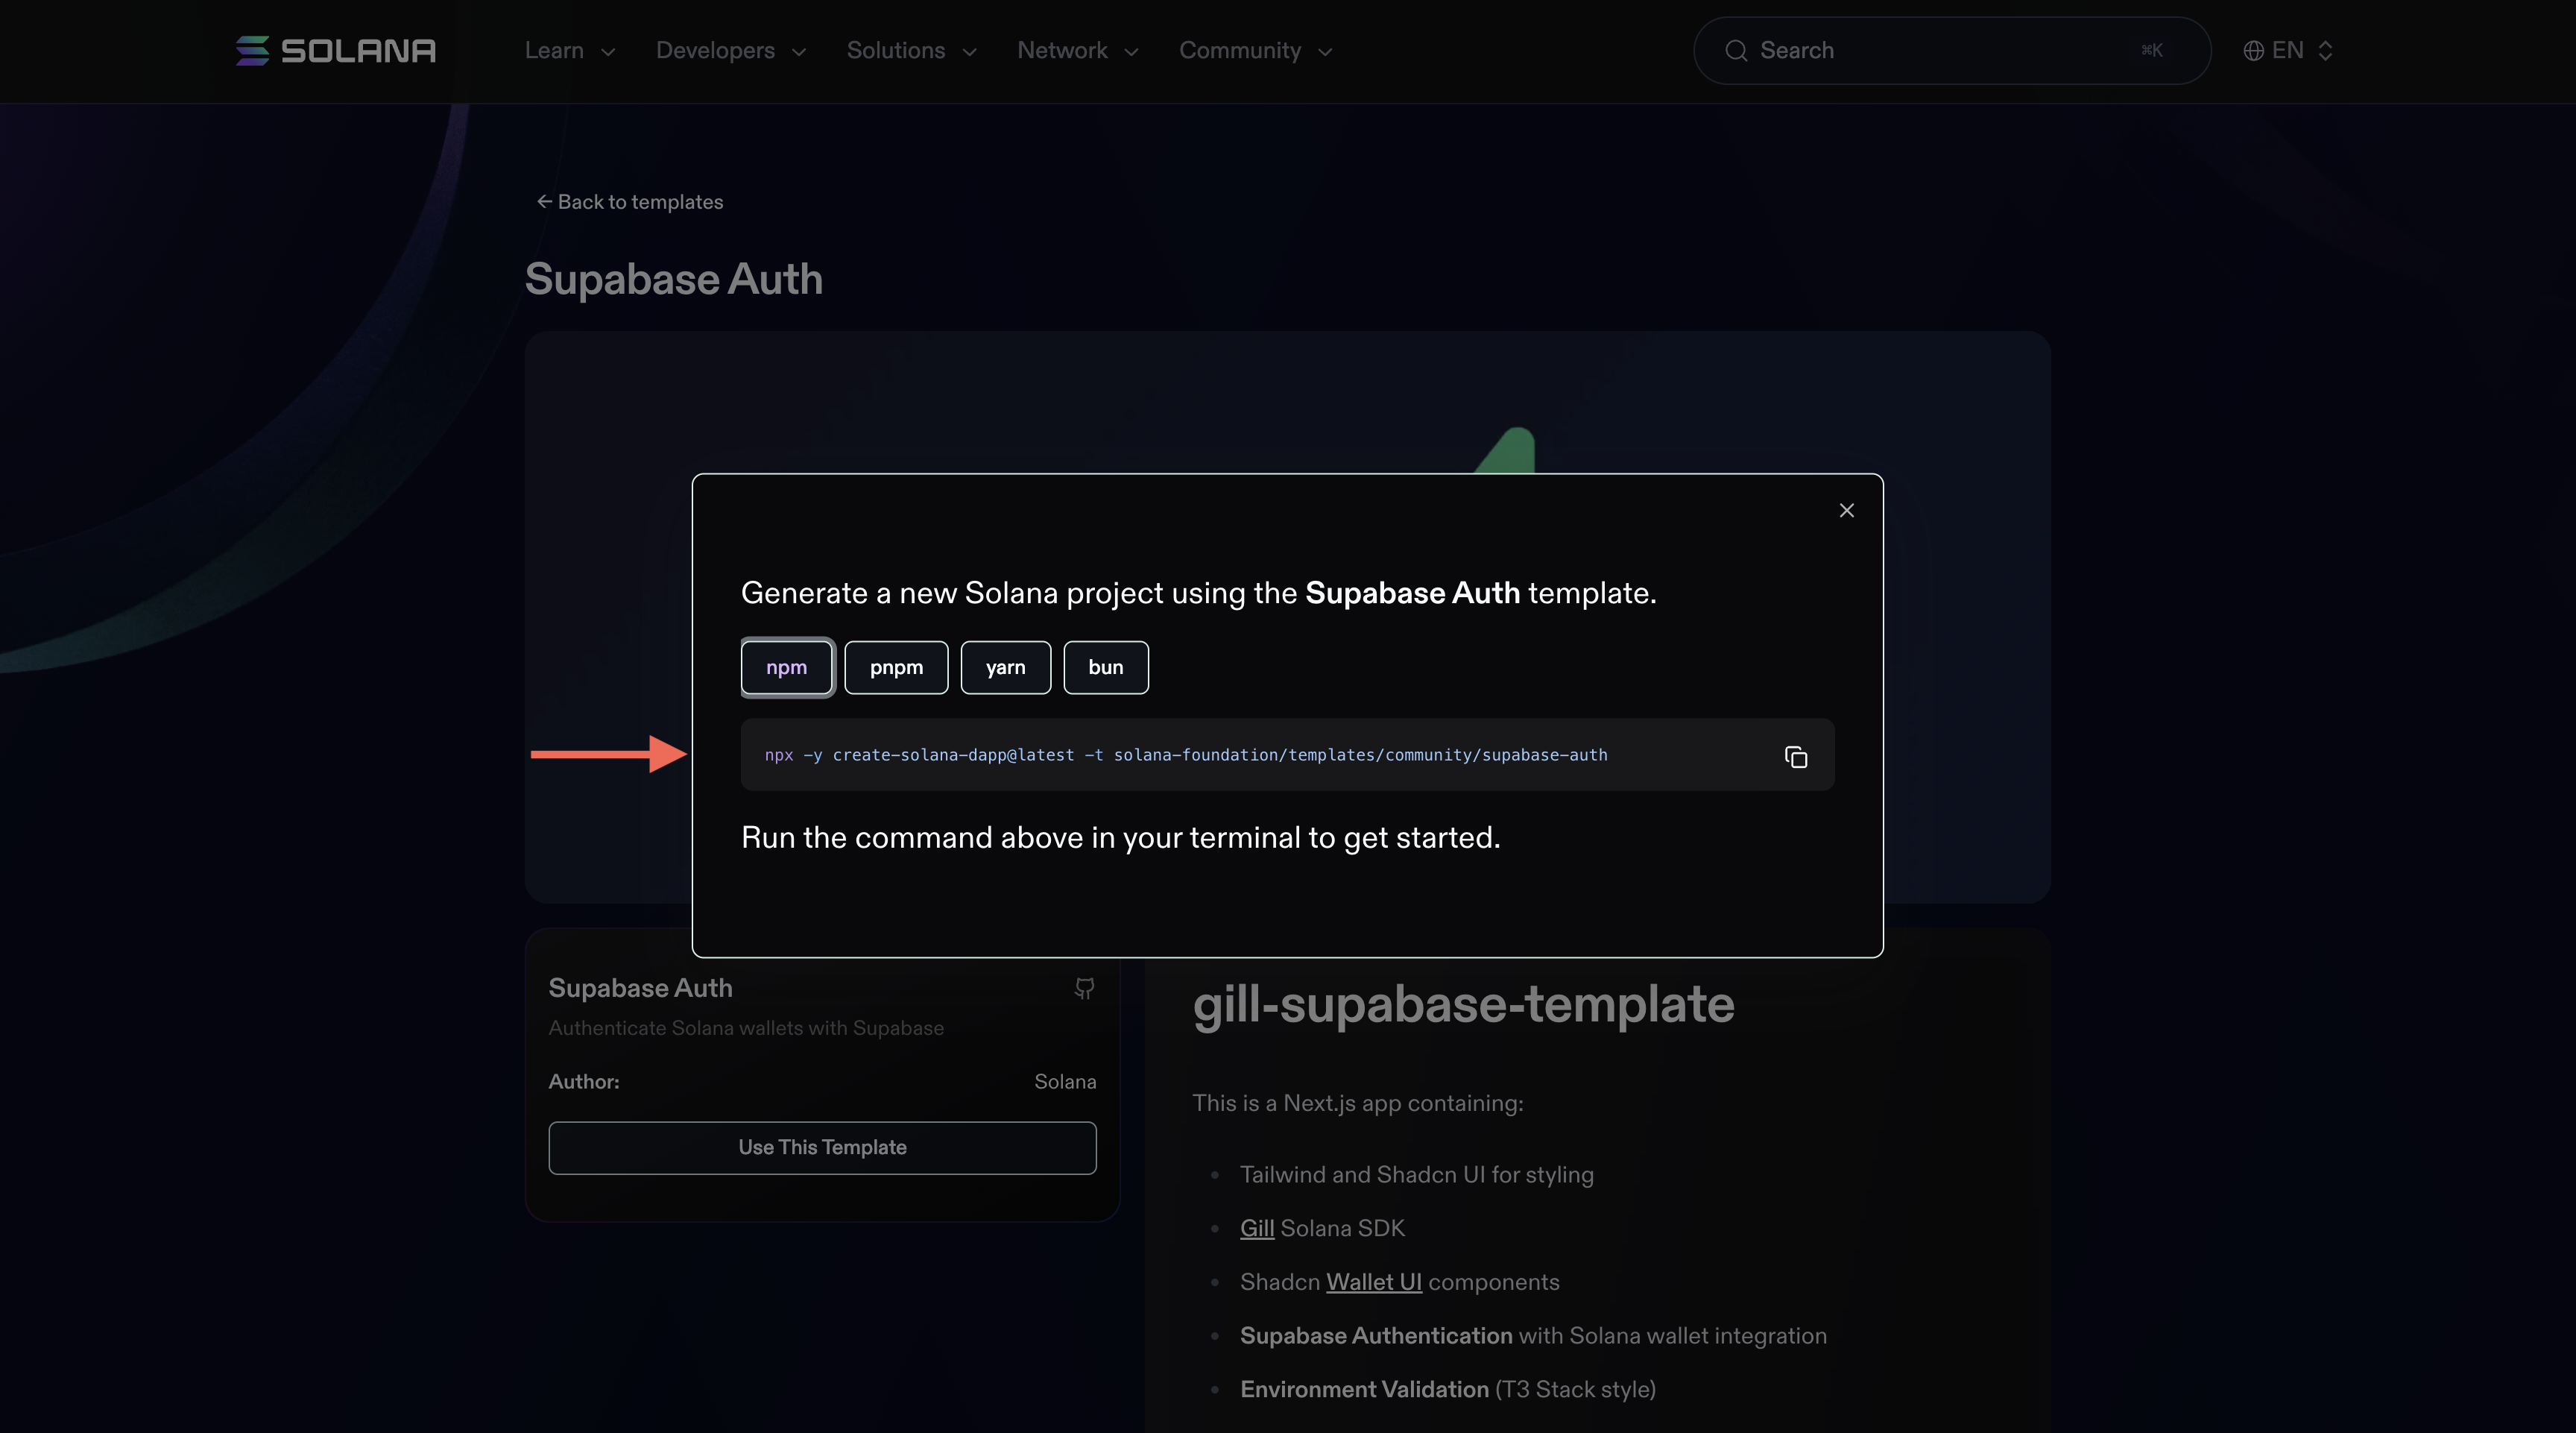 Copy The Command
This creates a new project directory with all the template code. You can find the template at templates.solana.com/supabase-auth.
Navigate into the project directory:
cd supabase-auth
You need to be in this directory for all the commands below.
- Install dependencies
npm install
- Create your Supabase project
You need a Supabase project before you can authenticate. Here's how to create one:
-
Go to supabase.com
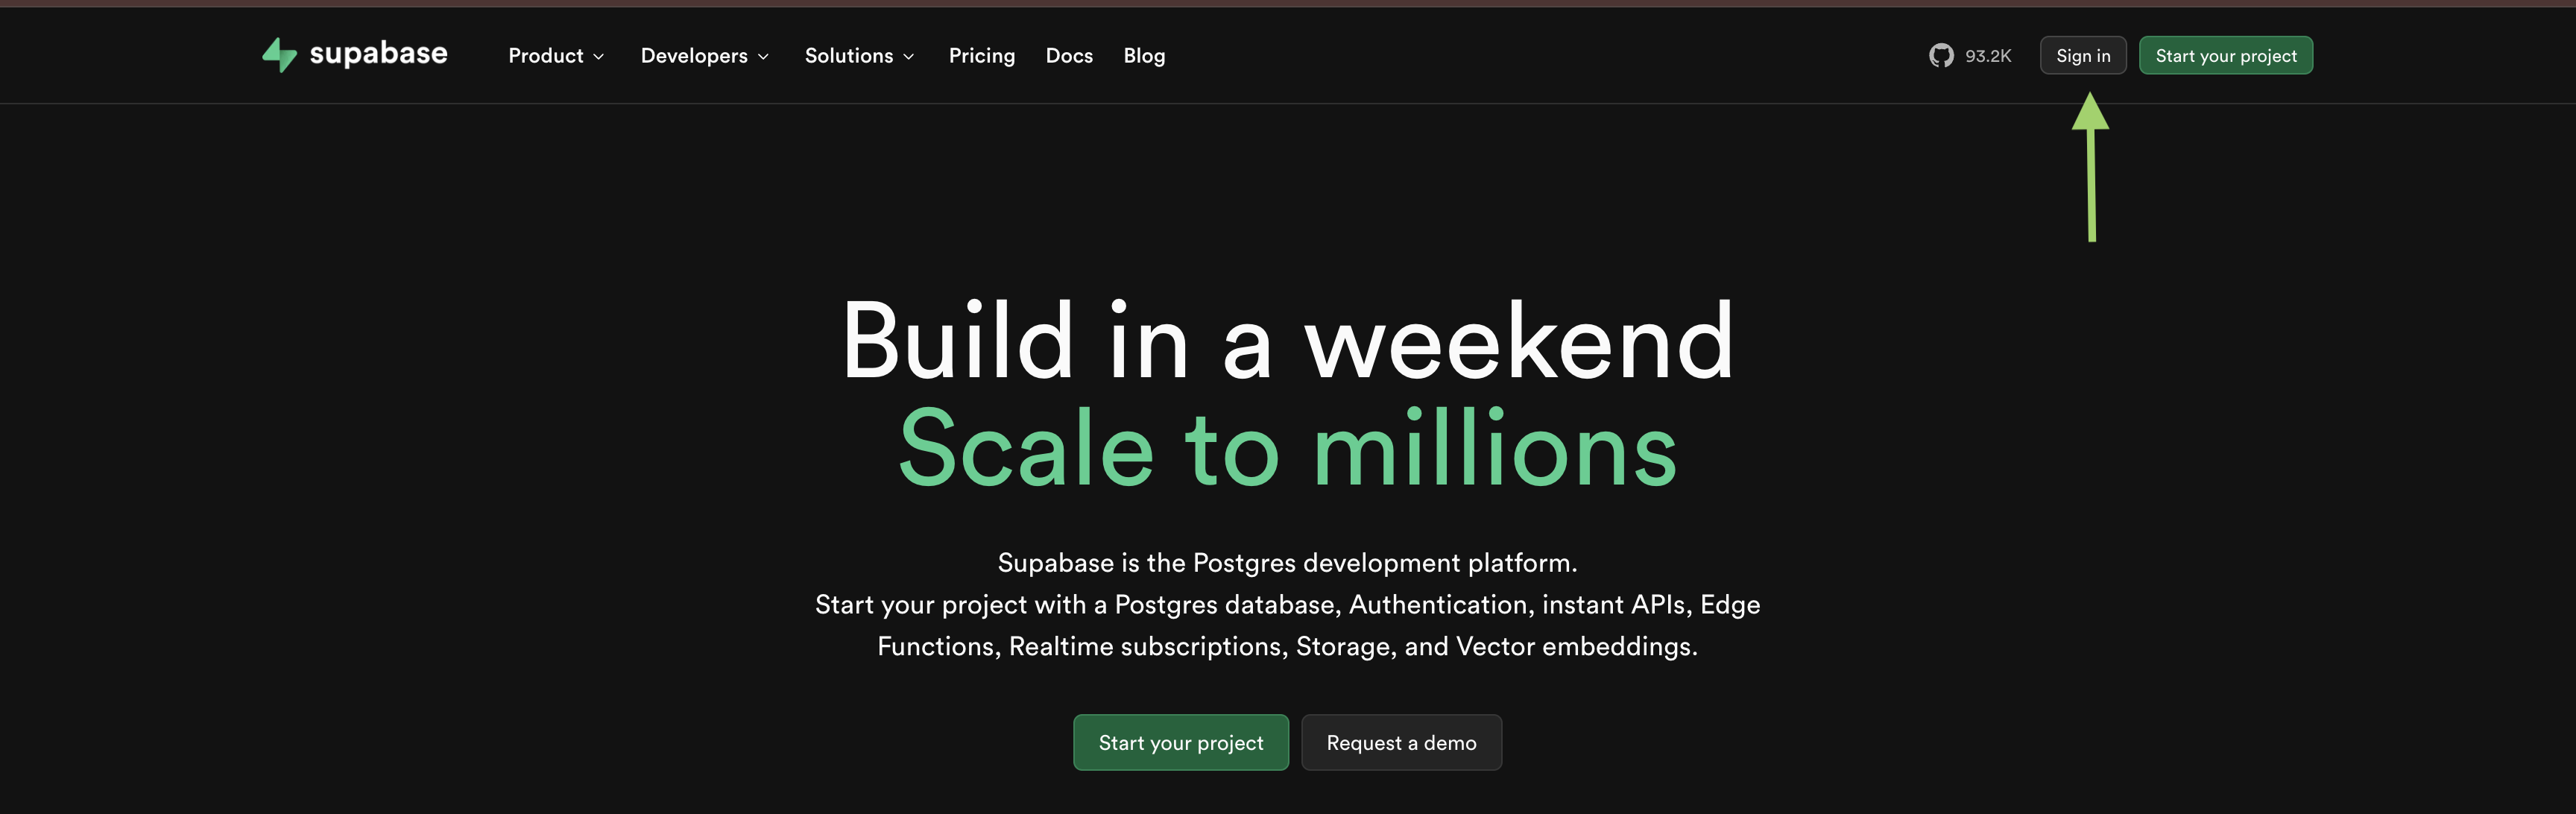 Go To Supabase
 -
Sign in with using your preferred Sign In Method.
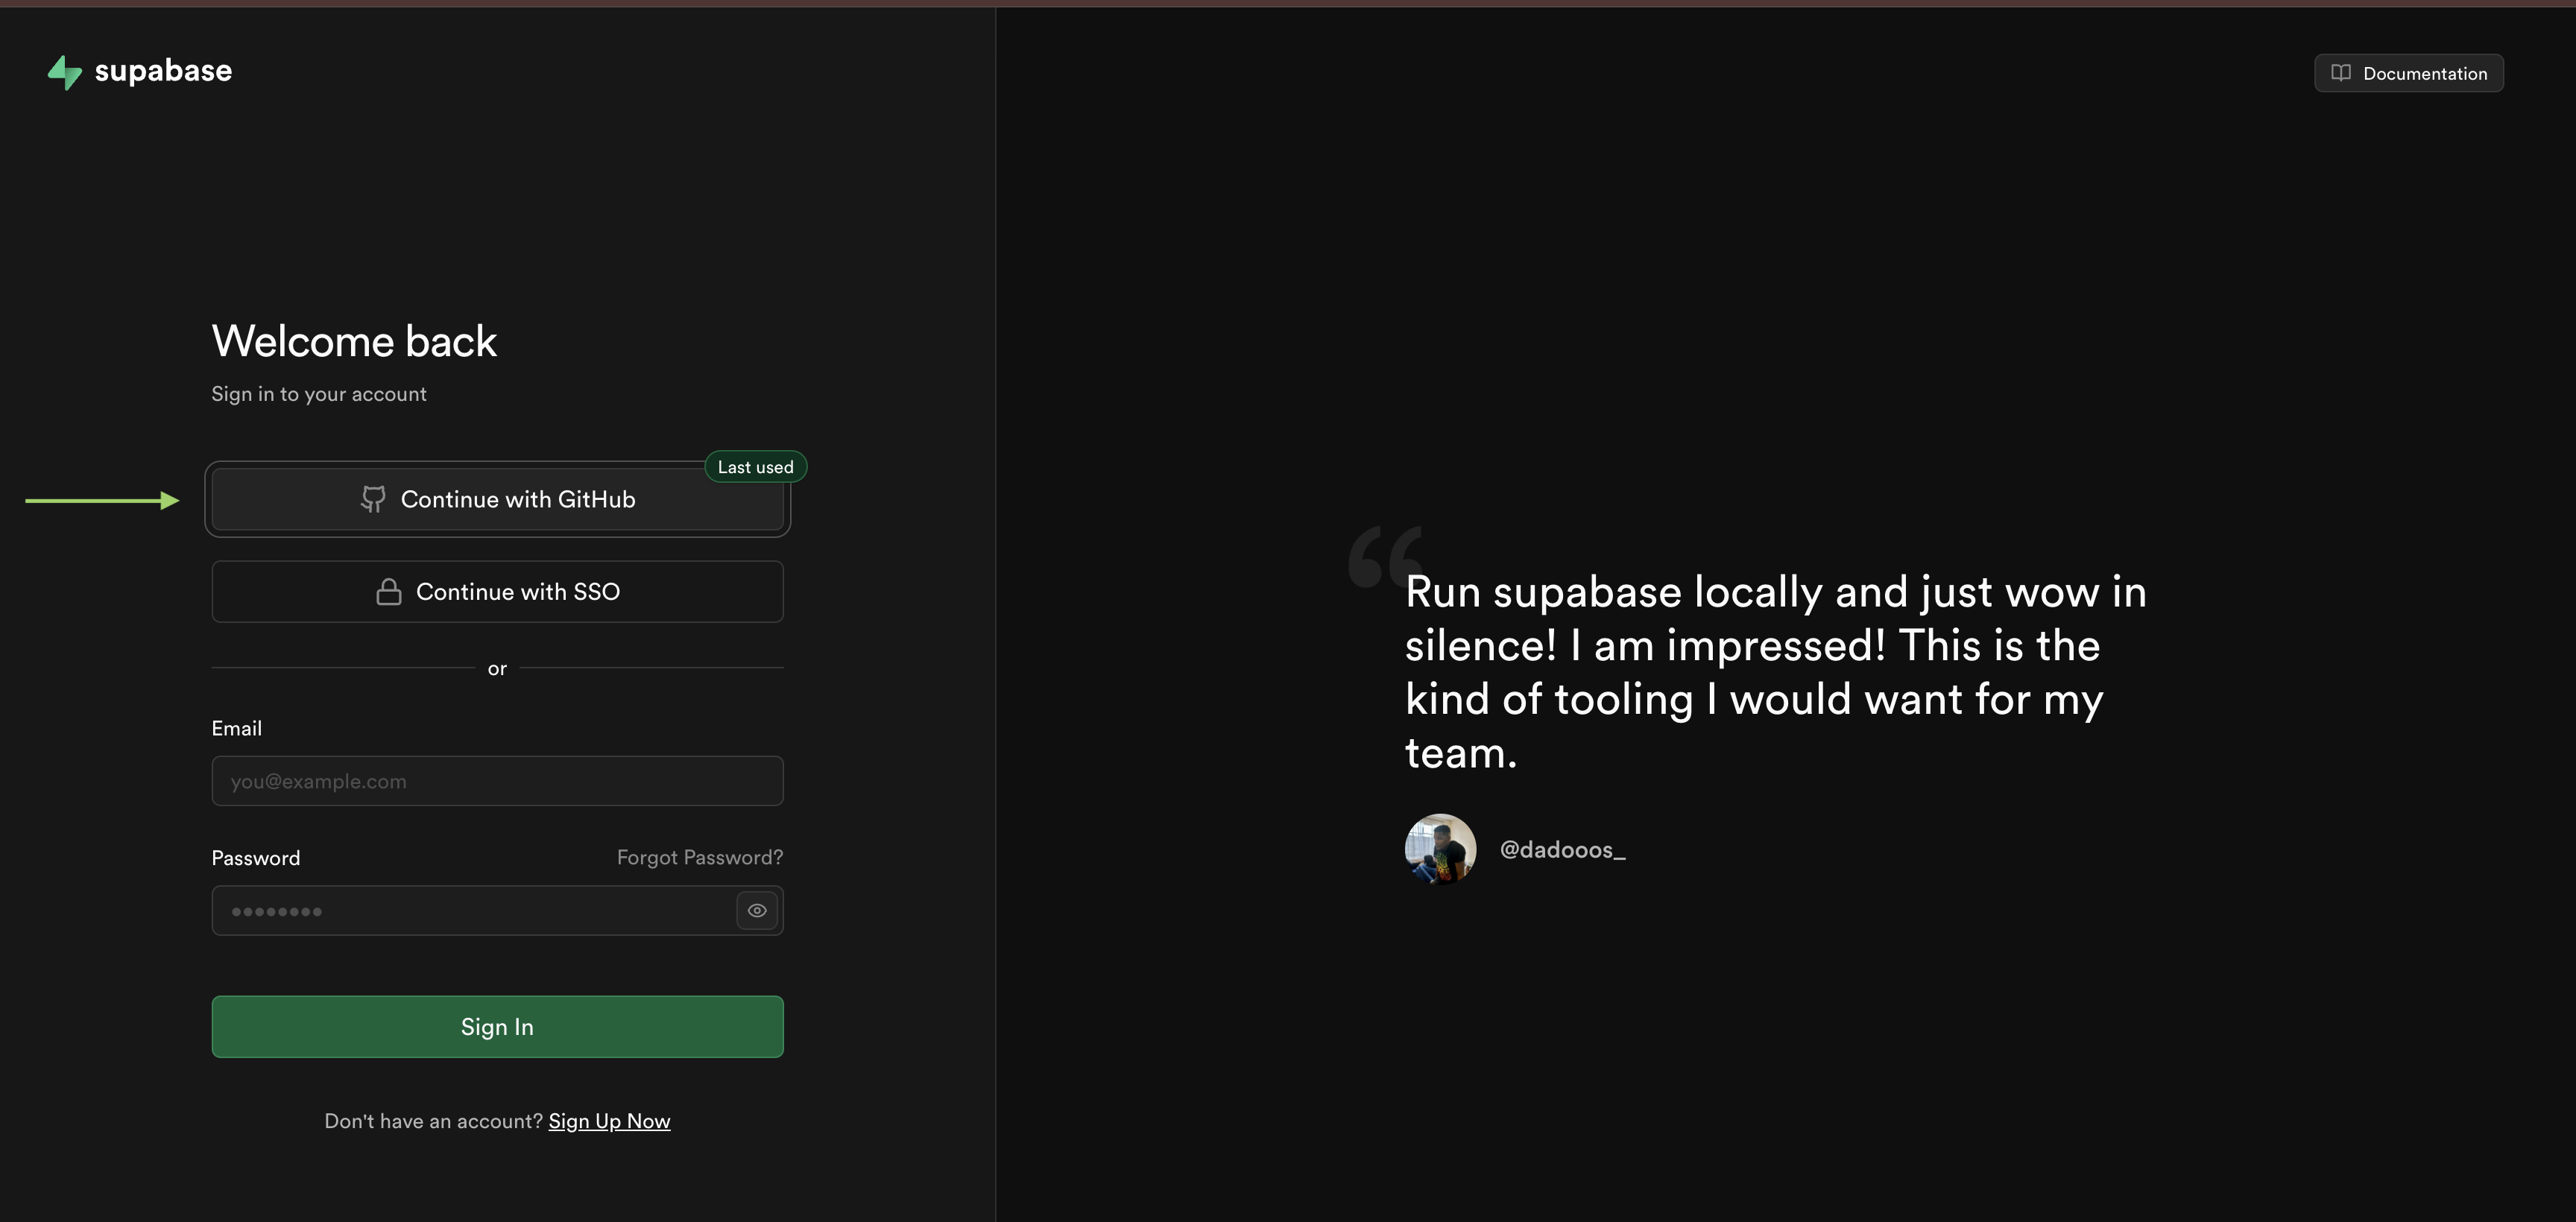 Sign In With Github or Email
 -
Click "New Project".
 Click On New Project
 -
Fill in your project details:
- Name it something memorable (like "solana-auth-test")
- Set a database password (save this somewhere safe)
- Choose a region close to you
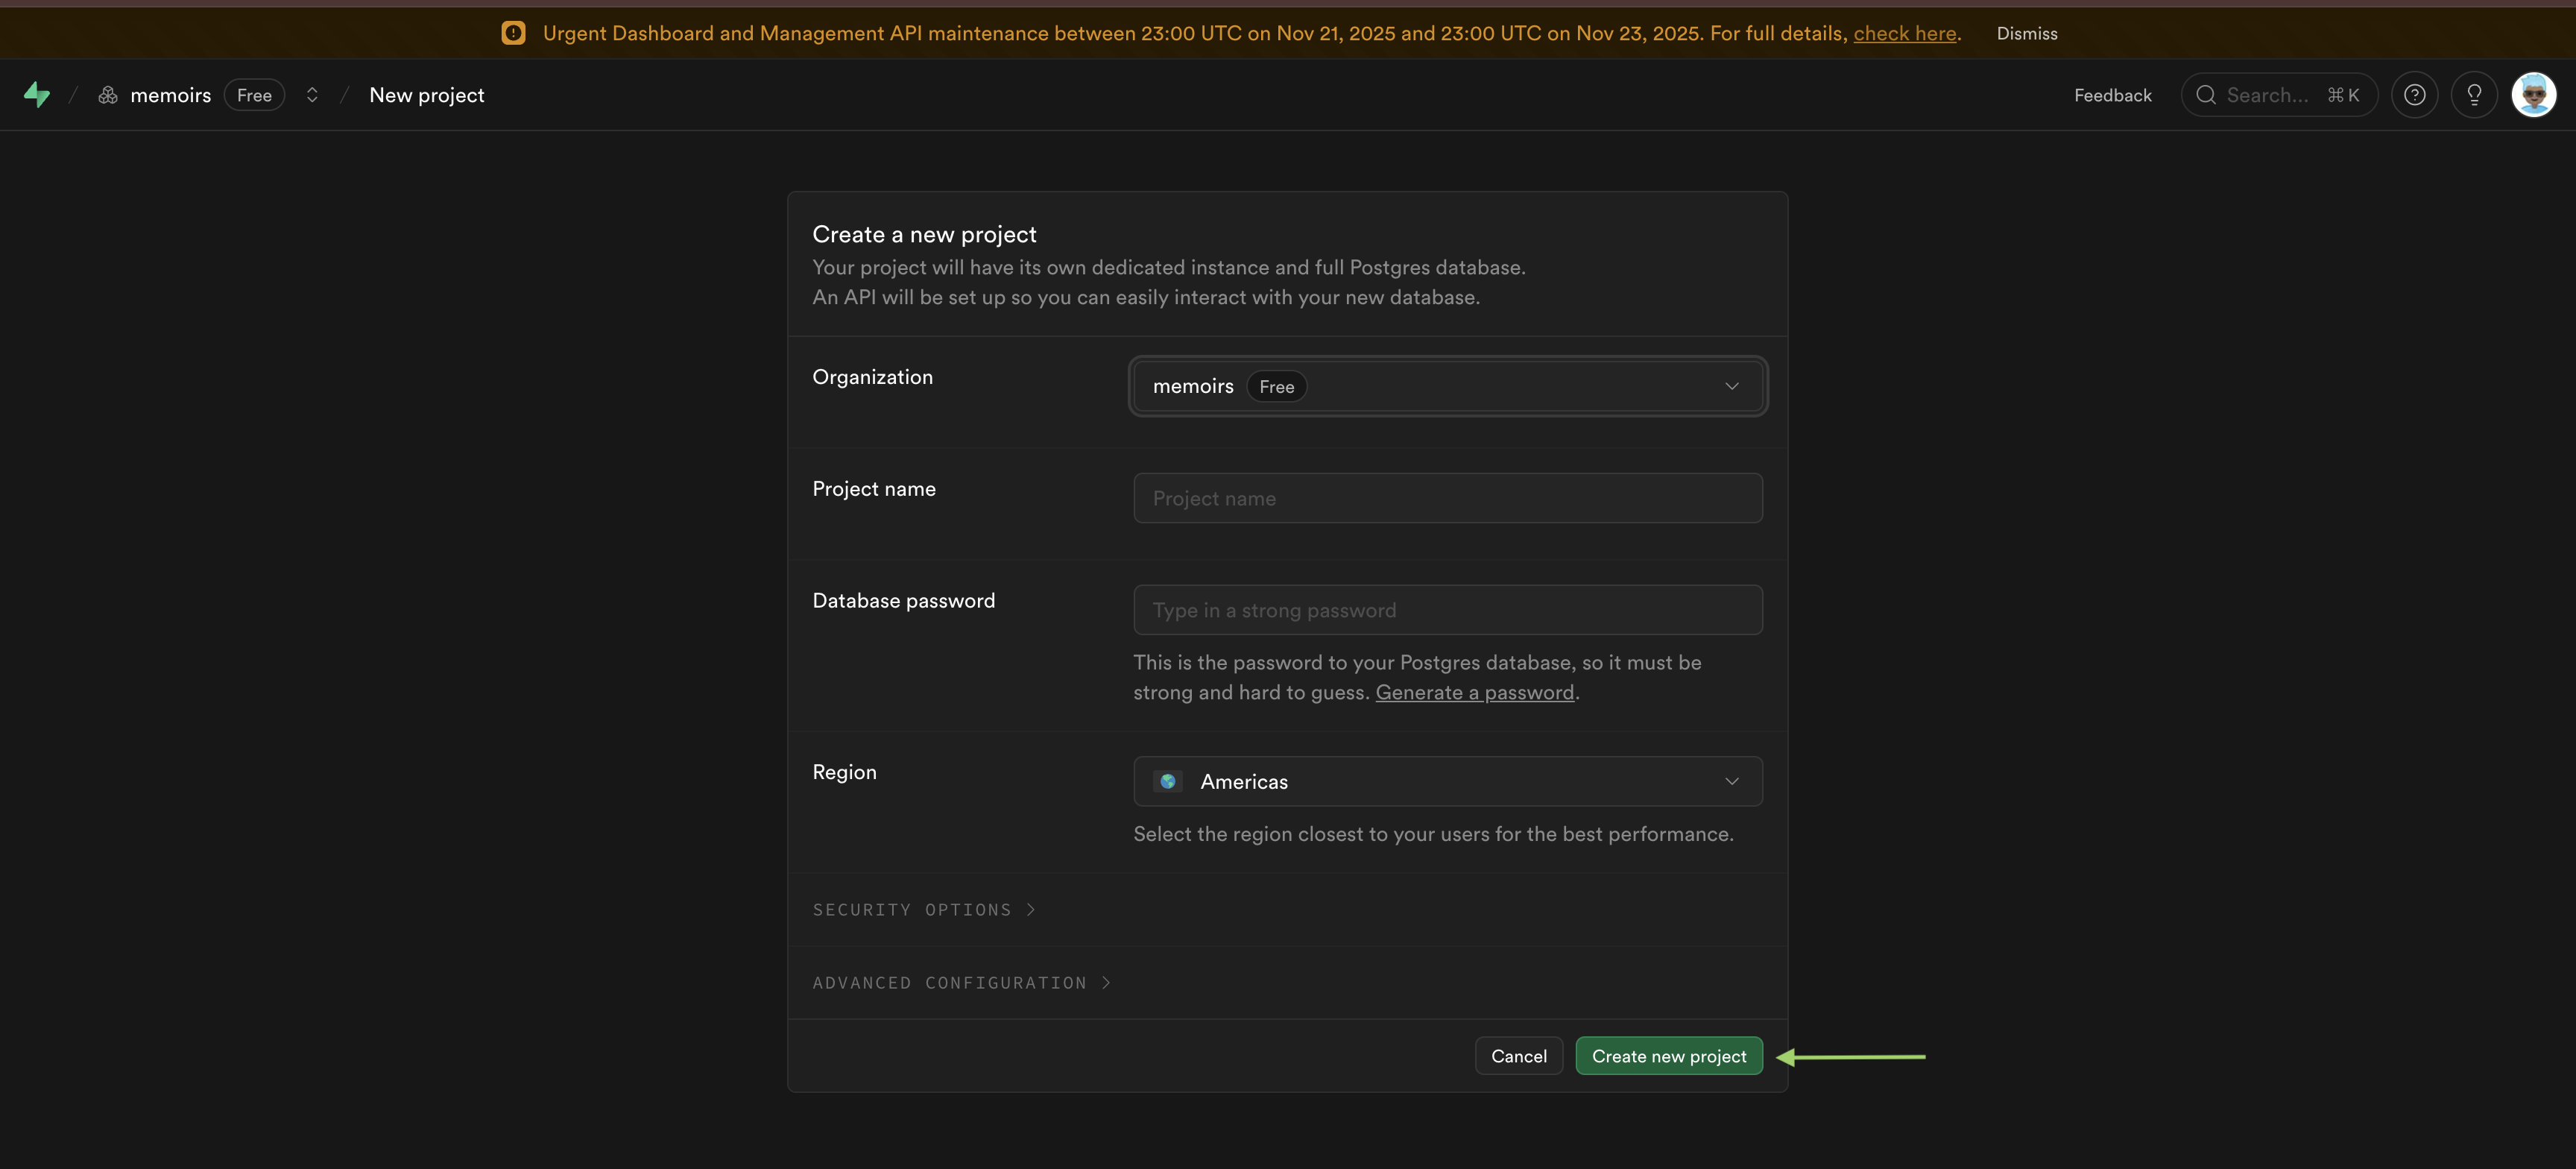 Create Your Project
-
Wait for the project to finish provisioning (about 2 minutes)
Once your project is ready, you'll see the project dashboard. Don't close this tab. You'll need it for the next steps.
Supabase needs a project to store user sessions and handle authentication. Each project has its own database and API keys. The free tier gives you everything you need for development.
- Enable Web3 Authentication in Supabase
This step is critical. Without it, authentication will fail with a 422 error. Don't skip this.
- In your Supabase dashboard, go to Authentication → Providers
- Scroll down to find Web3 (it may be under "Additional Providers" or "Additional")
- Toggle Web3 to enabled
- Save the changes
 Supabase Web3 authentication toggle enabled
If you don't see Web3 as an option, your Supabase project might not support it yet. Wallet authentication is still in beta for some projects. Try creating a new project or check the Supabase documentation for the latest status.
The template uses supabase.auth.signInWithWeb3(). This method only works if
wallet authentication is enabled in your project. If it's disabled, you'll get a
422 error when trying to sign in. The error message will say "Web3 provider is
disabled". If you see that, come back to this step.
- Get your Supabase credentials
You need two values from your Supabase project:
- In your Supabase dashboard, go to Settings → API
- Copy your Project URL (looks like
https://xxxxx.supabase.co) - Copy your anon/public key (the
anonkey, not theservice_rolekey)
Keep these handy. You'll paste them into a file in the next step.
The Project URL tells the Supabase client where to connect. The anon key is the public key that allows client-side access. The service role key is more powerful and should never be used in client-side code. That's why we use the anon key.
- Configure environment variables
Create a .env.local file from the example:
cp .env.example .env.local
Open .env.local in your editor. You'll see:
NEXT_PUBLIC_SUPABASE_URL="https://your-project.supabase.co"NEXT_PUBLIC_SUPABASE_ANON_KEY="your-anon-key-here"
Replace the placeholder values with your actual Supabase credentials:
NEXT_PUBLIC_SUPABASE_URL="https://xxxxx.supabase.co"NEXT_PUBLIC_SUPABASE_ANON_KEY="your-actual-anon-key-here"
Make sure the URL is in quotes. Make sure the key is in quotes. Don't add any extra spaces.
Next.js automatically loads .env.local. It ignores it in git, so your secrets
stay local. Never commit .env.local to version control. The .env.example
file is safe to commit because it has placeholder values.
- Run the project
Start the development server:
npm run dev
This starts Next.js with Turbopack (faster than the default webpack). You should see output like:
▲ Next.js 16- Local: http://localhost:3000
Open http://localhost:3000 in your browser. You should see a "gm" screen with a dashboard. That's how you know it's working.
If the page loads but shows errors in the browser console, don't stress. We'll cover common errors in the Troubleshooting section. For now, if you see the "gm" screen, you're good to go.
6. Connecting Your Wallet
Make sure you have a Solana wallet extension installed (Phantom, Solflare, or Backpack) before continuing. Without a wallet, you won't be able to connect or authenticate.
Wallet connection happens before authentication. You connect your wallet to read blockchain data. Then you authenticate with Supabase to create a session. They're separate steps.
Finding the wallet dropdown
Look at the header of the page. You'll see a button that says "Select Wallet" or
"Connect Wallet". That's the wallet dropdown. It's in
src/components/wallet-dropdown.tsx.
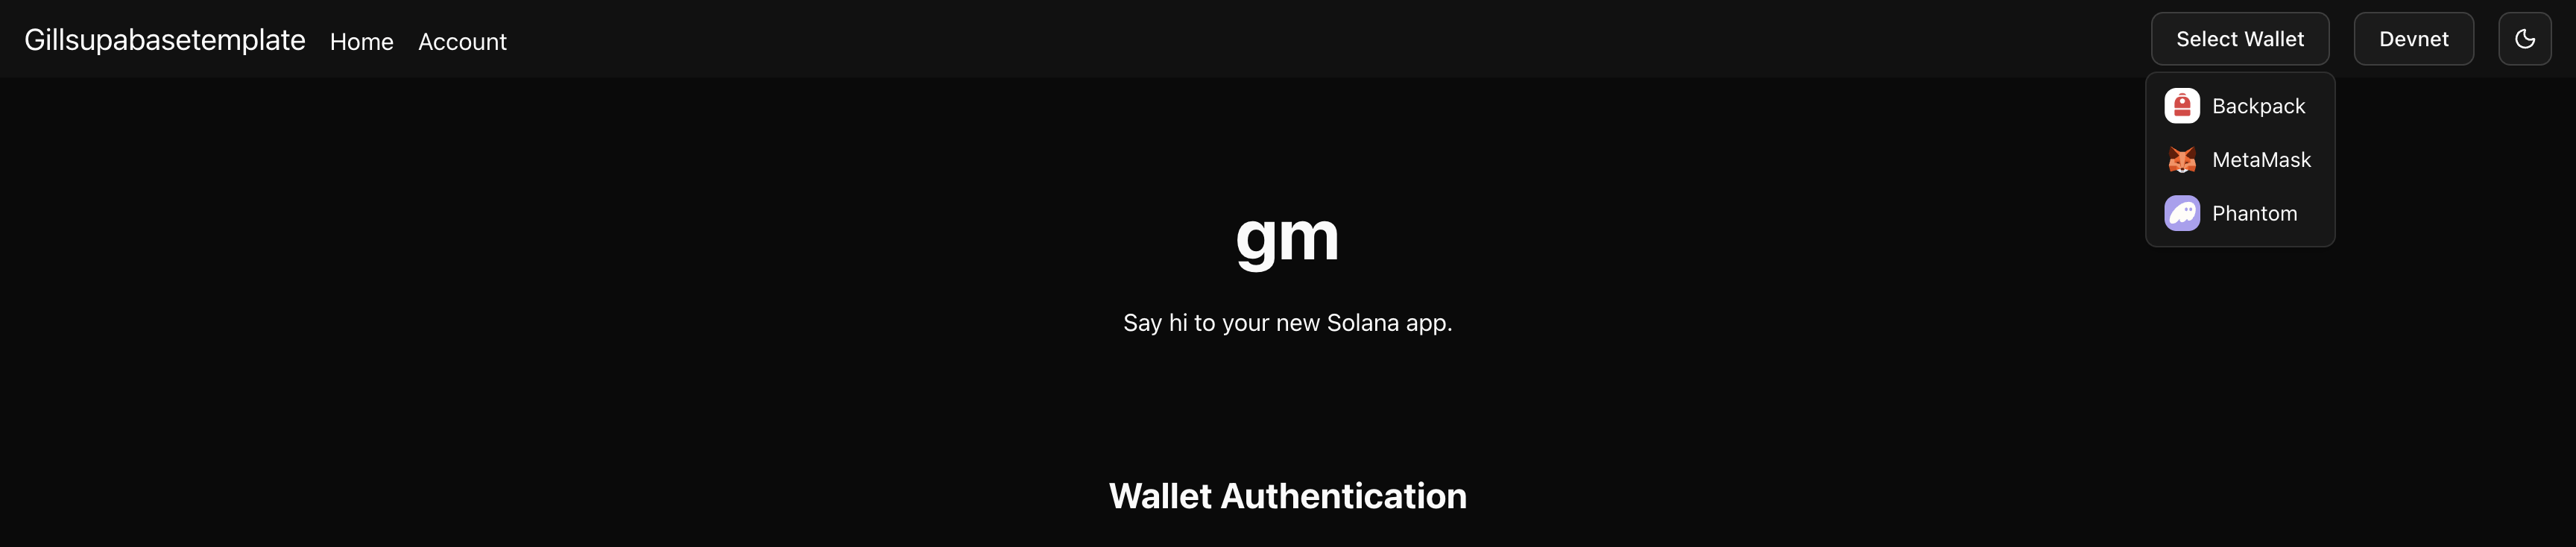 Wallet dropdown in the header
If you don't see it, check that your wallet extension is installed. The wallet dropdown detects installed wallets automatically. If no wallets are detected, the dropdown shows a link to get a Solana wallet.
Connecting your wallet
Click the "Select Wallet" button. A dropdown menu appears. It lists all detected wallets. You'll see options like:
- Phantom
- Solflare
- Backpack
- Other installed wallets
Click on your wallet. Your wallet extension will open a popup. It asks you to approve the connection. Click "Approve" or "Connect" in the popup.
Once connected, the button in the header changes. It shows your wallet address
truncated (like J4AJ...MAAP). That's how you know it's connected.
 Connected wallet showing truncated address
What happens behind the scenes: The wallet dropdown uses the
useWalletConnection() hook from @solana/react-hooks. When you click a wallet
in the dropdown, it calls connect(connectorId) to establish the connection.
The hook manages the connection state automatically and exposes it to your
components through connected, status, and other properties.
7. Signing In with Solana
Once your wallet is connected, you can authenticate with Supabase. This creates a session that persists across page refreshes. You'll be able to access protected routes.
Authentication creates a Supabase session that lets you access protected routes
and store user data. Without authentication, you can't access /account or
other protected pages.
Finding the sign-in card
Scroll down on the home page. You'll see a card titled "Sign in with Solana".
It's in the dashboard section. The component is
src/components/auth/wallet-login.tsx.
If you haven't connected your wallet yet, the card shows "Connect Wallet First" and the button is disabled. Connect your wallet first, then come back to this card.
 Sign in with Solana card
The authentication flow
Once your wallet is connected, the card shows "Wallet Connected: [your address]" in green text. Click the Sign in with Solana button.
Your wallet extension will open a popup. It asks you to sign a message. The message says "Please sign this message to authenticate with your wallet." This is the authentication challenge.
Click "Approve" or "Sign" in your wallet popup. The wallet signs the message cryptographically. This proves you control the wallet address.
How it works: Your wallet signs a message that Supabase verifies. If the signature matches your wallet address, Supabase creates a session and you're authenticated.
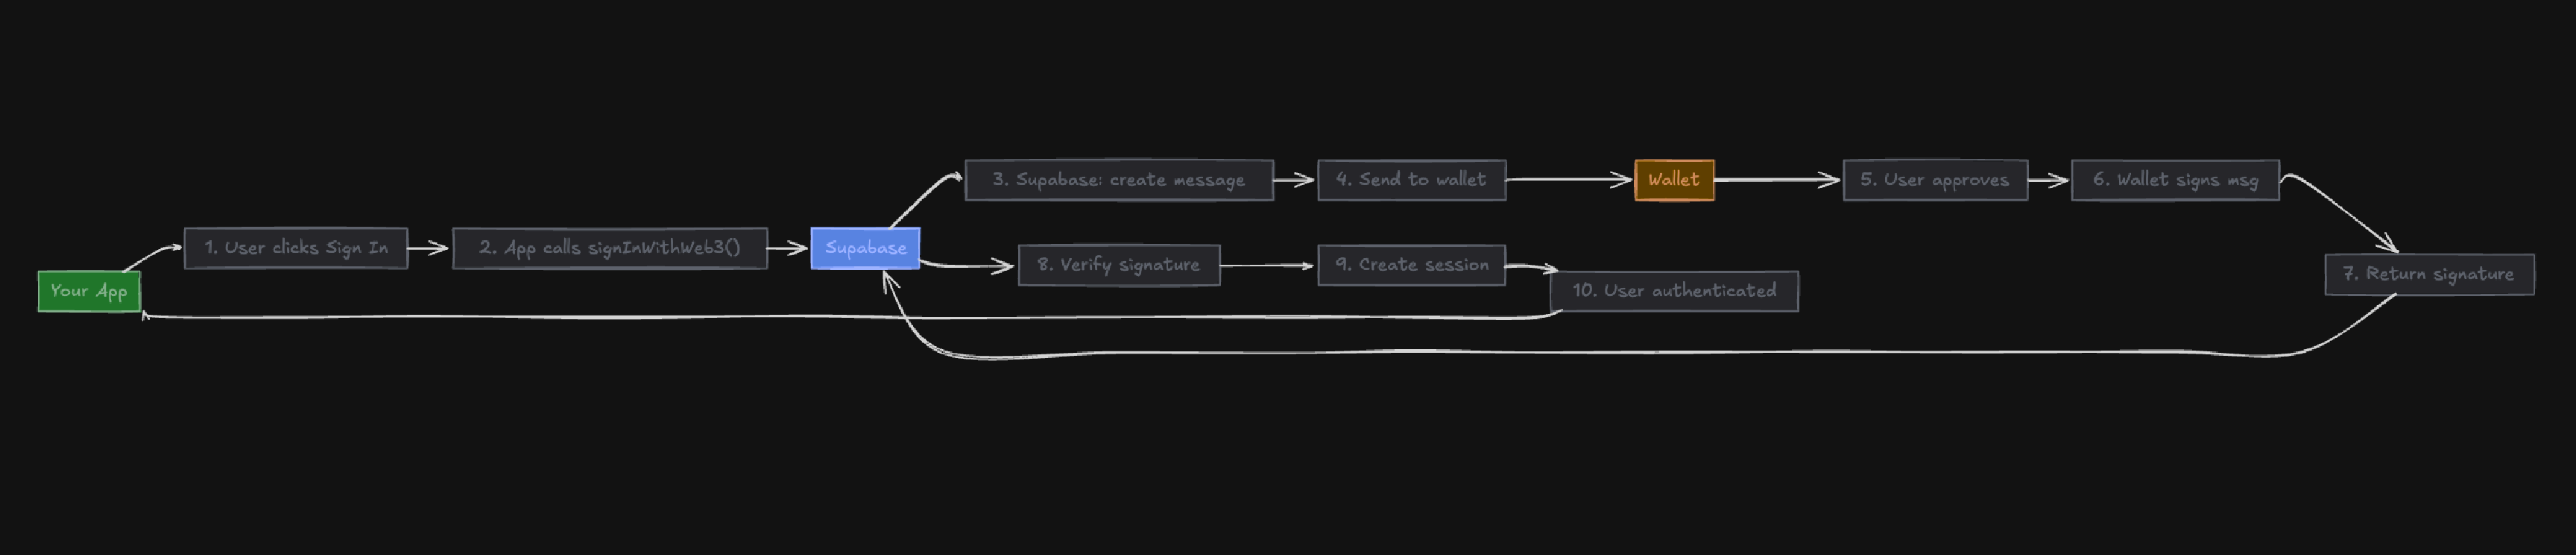 Authentication flow diagram
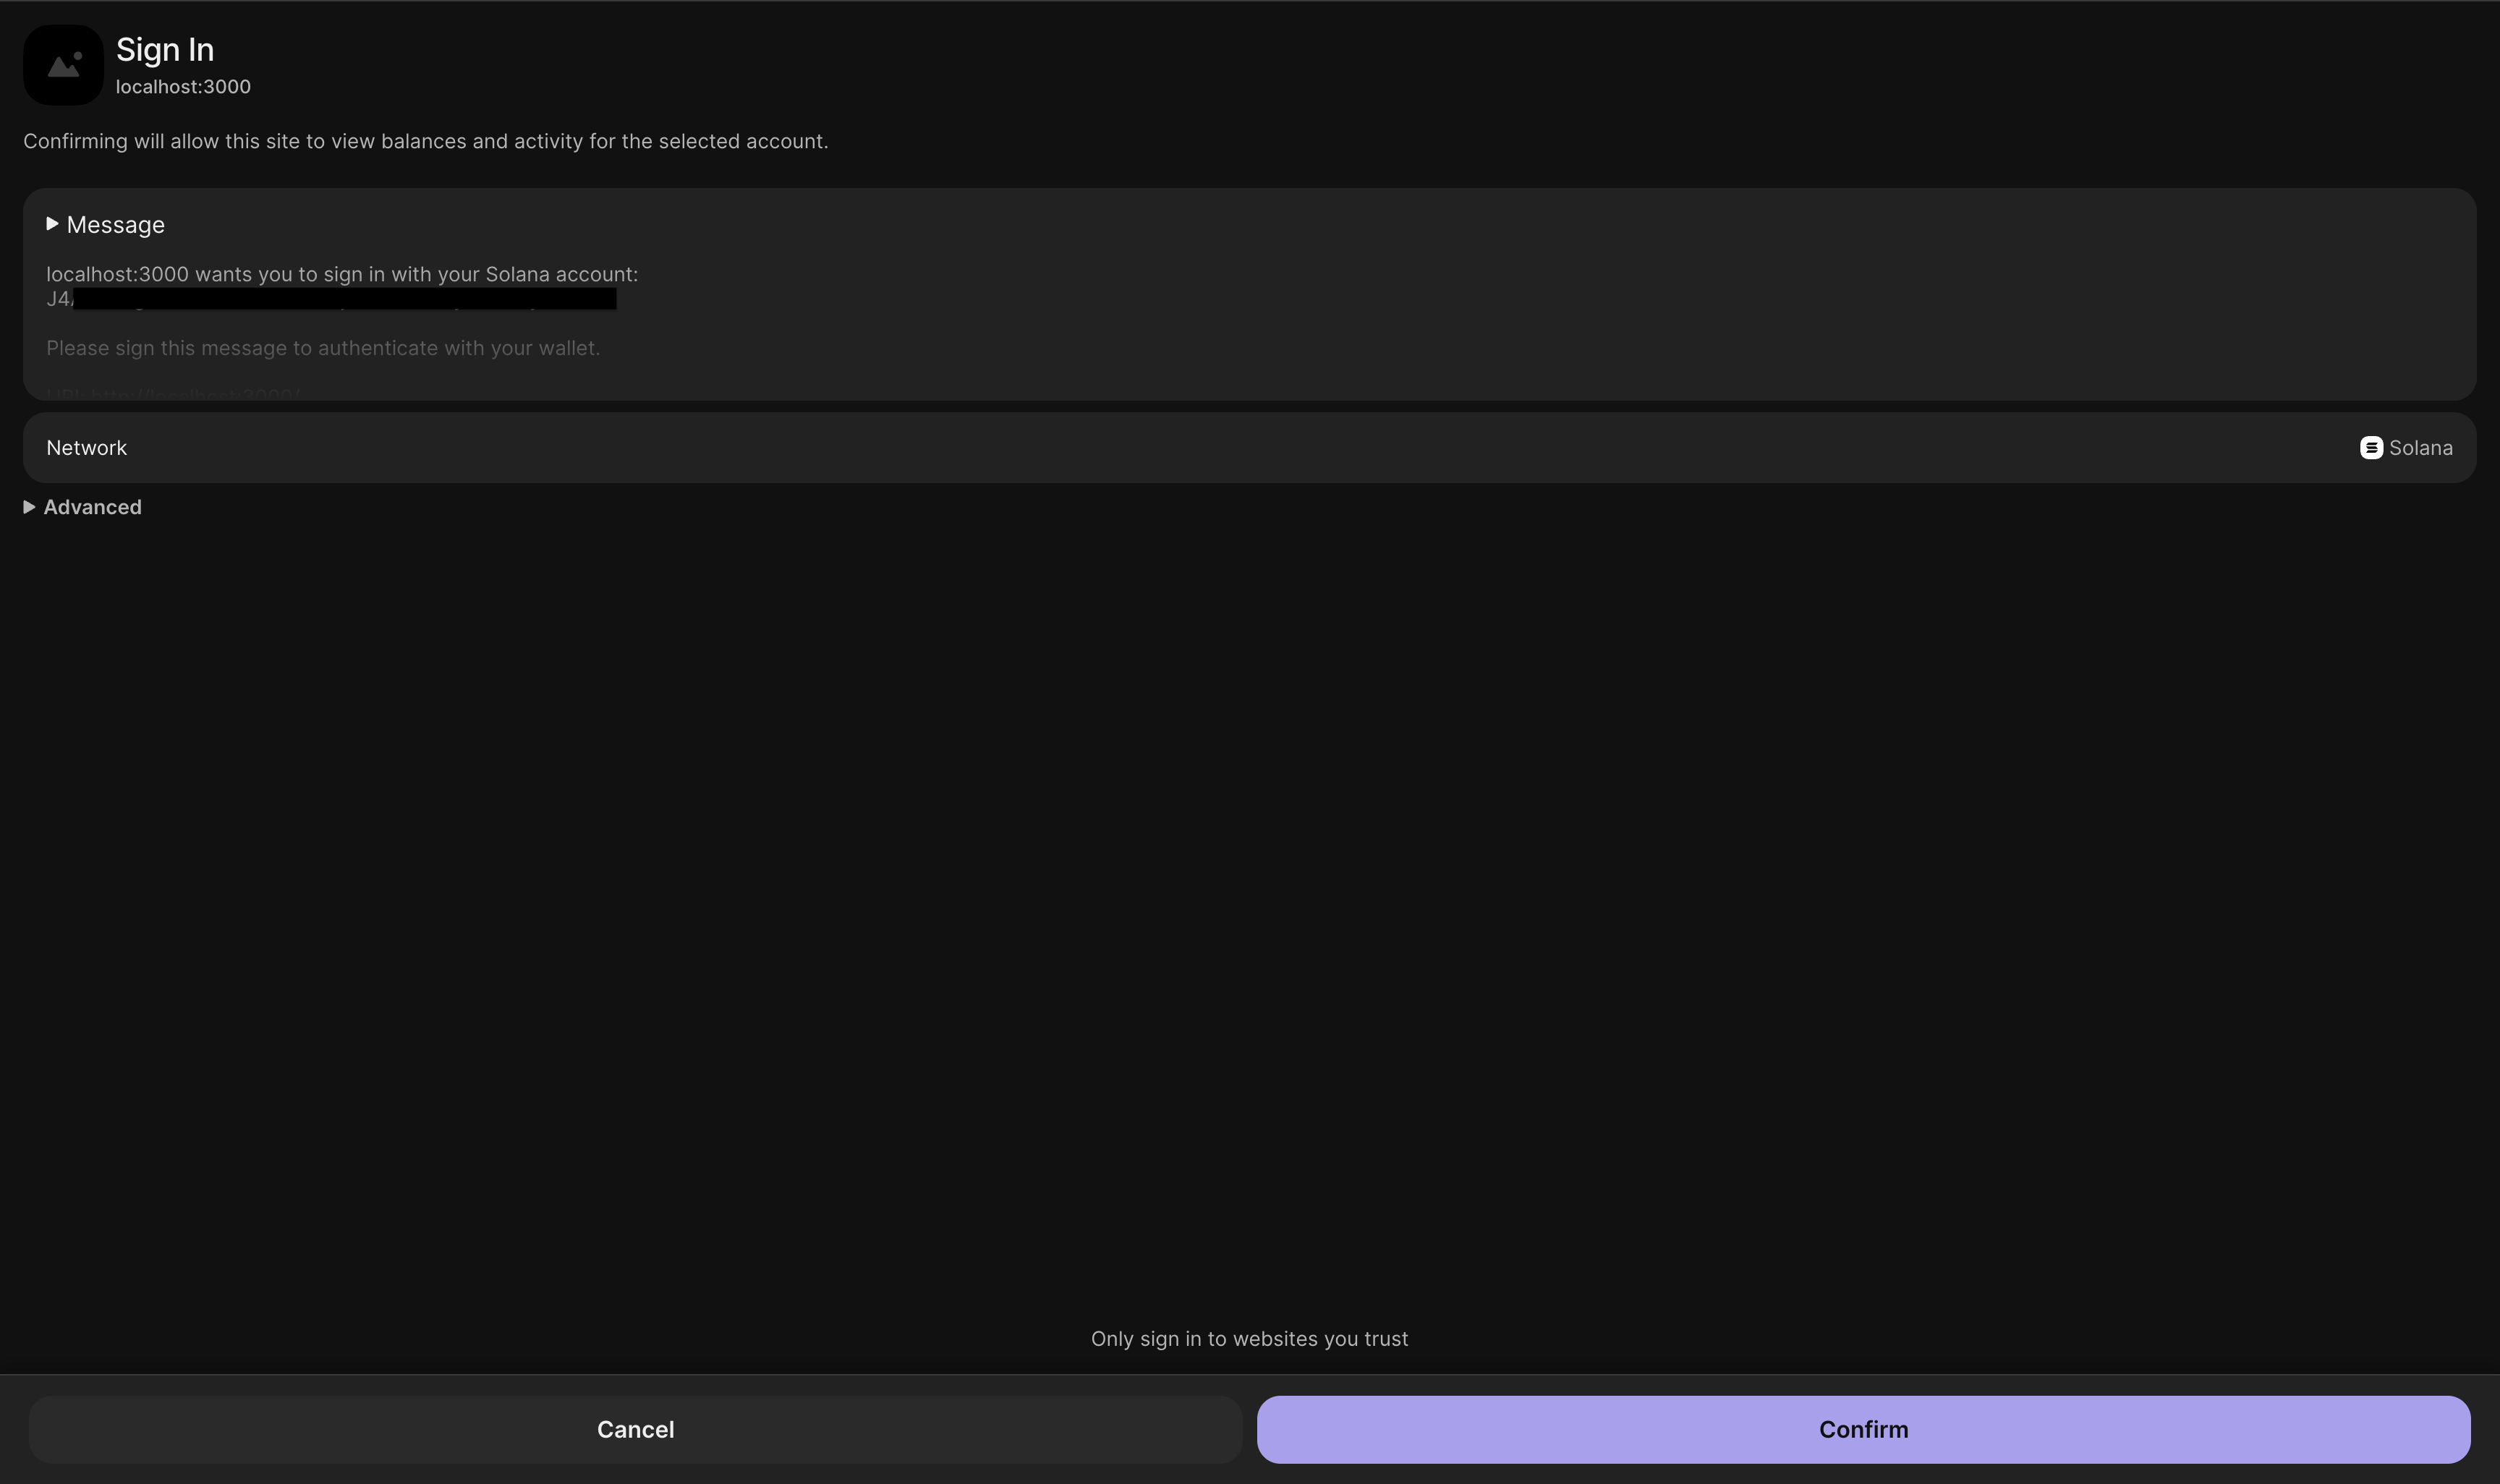 Wallet popup asking to sign authentication message
If authentication succeeds, you'll see "Wallet authenticated successfully!" in
green text. The card updates automatically to show a welcome message with your
wallet address and buttons to view account details or sign out. The UI updates
via the AuthProvider state changes - no manual navigation is needed.
Verifying authentication
After signing in, check the card. It should show "Welcome Back!" with your wallet address. You'll see two buttons: "View Account Details" and "Sign Out".
The AuthProvider component automatically updates the UI when authentication
state changes. Any component using useAuth gets the updated state.
Session persistence
The session persists across page refreshes. Users don't have to sign in every time they visit. The session lasts until they sign out or it expires.
Accessing protected routes
Once authenticated, you can access protected routes. Try clicking "View Account
Details" in the welcome card. It takes you to /account. Or navigate to
/account directly in your browser.
If you're not authenticated and try to access /account, the ProtectedRoute
component redirects you to the home page. It checks useAuth() for the user. If
user is null, it redirects.
The protected route logic is in src/components/auth/protected-route.tsx. It
wraps the /account page content. You can use it to protect any route you want.
Signing out
To sign out, click the "Sign Out" button in the welcome card. This signs you out from Supabase and disconnects your wallet, giving you a clean slate.
Common authentication errors
"Authentication failed: Web3 provider is disabled"
This means wallet authentication isn't enabled in your Supabase project. Don't stress. Go back to your Supabase dashboard. Navigate to Authentication → Providers. Find Web3 and toggle it to enabled. Save the changes. Then try signing in again.
"Authentication failed: [422 error]"
A 422 error usually means one of these:
- Wallet authentication isn't enabled (see above)
- Your Supabase project doesn't support wallet authentication (check if you're on a supported plan)
- The wallet connection wasn't established properly
If you see a 422 error, check the browser console. You might see more details about what went wrong. The error message from Supabase usually tells you what's missing.
"No wallet connectors available"
This means no wallet extensions were detected. Make sure you have a Solana
wallet extension installed and enabled. The template uses @solana/react-hooks
to auto-discover available wallet connectors. Make sure you've connected your
wallet before trying to authenticate.
"Please connect a wallet first"
This message appears if you try to sign in without connecting your wallet. Connect your wallet using the dropdown in the header first. Then come back to the sign-in card.
"Failed to authenticate with wallet. Please try again."
This is a generic error. Check the browser console for more details. It might be
a network issue or a problem with the Supabase connection. Make sure your
.env.local file has the correct Supabase credentials.
Understanding the authentication state
The useAuth hook gives you access to authentication state (user, session,
loading, signOut). You can use this hook in any component to check
authentication status.
8. Exploring Protected Routes
Protected routes require authentication. Unauthenticated users can't access
them. The template includes a ProtectedRoute component that handles this. (See
Architecture Overview for how it works.)
Understanding the ProtectedRoute component
The ProtectedRoute component is in src/components/auth/protected-route.tsx.
It wraps any content you want to protect. It checks authentication status and
handles redirects.
Here's how it works:
- It uses the
useAuthhook to get the current user - If
loadingis true, it shows a loading spinner - If
useris null (not authenticated), it redirects to home - If authenticated, it renders the children
The component uses router.replace('/') to redirect. This replaces the current
URL in history. Users can't go back to the protected page after being
redirected.
The /account route
The /account route is protected. The page file is src/app/account/page.tsx.
It wraps the account content with ProtectedRoute:
<ProtectedRoute><AccountFeatureIndex /></ProtectedRoute>
If you're not authenticated and try to visit /account, you'll be redirected to
the home page. The redirect happens automatically. You'll see a brief loading
state, then the redirect.
Redirecting is better UX than showing an error. Users know they need to sign in. They're taken to a place where they can sign in. The redirect is instant, so it doesn't feel broken.
The account page flow
The account page has two parts:
- Index page (
/account) - Redirects to the detail page if a wallet is connected - Detail page (
/account/[address]) - Shows account details for a specific address
Both routes are protected. The /account/[address] route
(src/app/account/[address]/page.tsx) is also wrapped with ProtectedRoute.
You can navigate directly to /account/[address] if you know the address, but
you must be authenticated first.
The index page (src/features/account/account-feature-index.tsx) checks if a
wallet is connected. If account exists, it redirects to /account/[address].
If not, it shows a wallet dropdown so you can connect.
This flow ensures you always see account details for a connected wallet. If you're authenticated but don't have a wallet connected, you can still connect one.
What you'll see on the account page
Once authenticated and on /account/[address], you'll see:
- Account balance - Shows SOL balance for the address
- Account buttons - Actions like send and receive
- Token list - Shows SPL tokens held by the address
- Transaction history - Shows recent transactions for the address
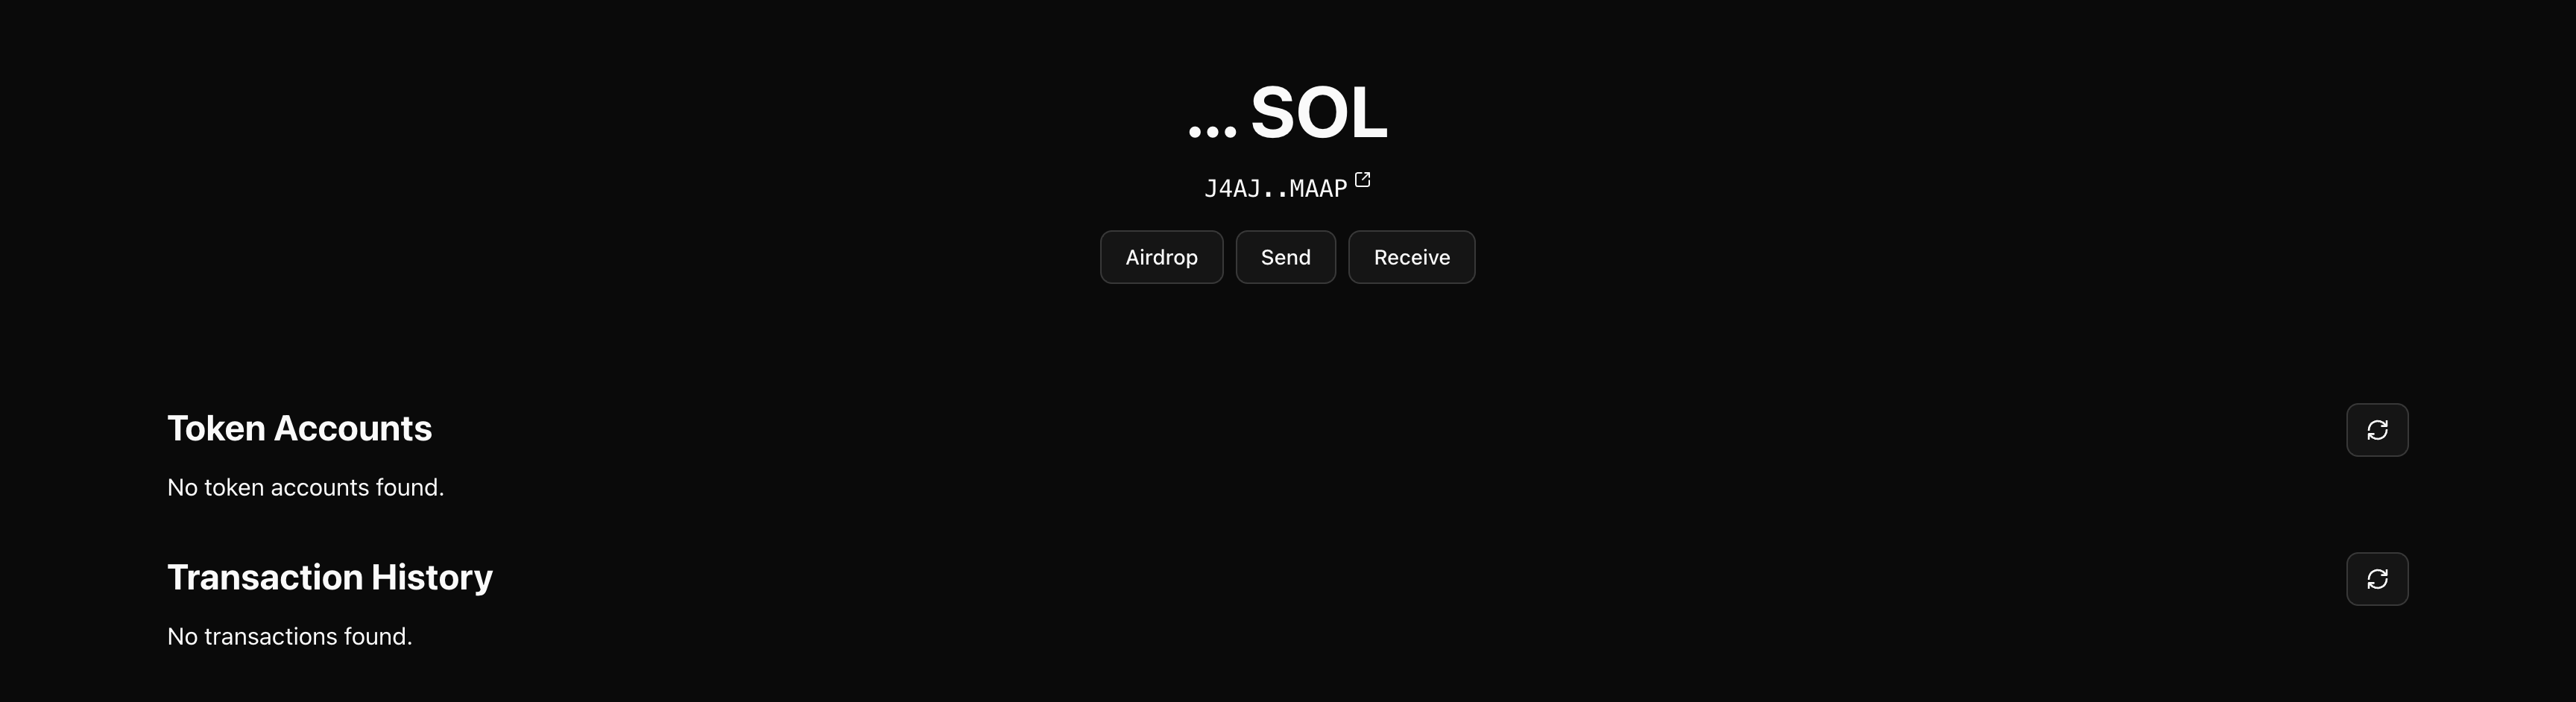 Account page showing balance, tokens, and transactions
The page uses React hooks with @solana/react-hooks to fetch data from the
Solana network.
The account detail component is in
src/features/account/account-feature-detail.tsx. It extracts the address from
the URL params. It validates the address using toAddress from
@solana/client. If the address is invalid, it shows an error.
Testing protected routes
To test the protection, try this:
- Sign out (if you're signed in)
- Try to navigate to
/accountdirectly in your browser - You should be redirected to the home page
You can also check the browser console. You'll see a log message: "Protected route: User not authenticated, redirecting to home". This confirms the protection is working.
If you're authenticated and visit /account, you'll see the account page. The
ProtectedRoute component checks authentication and renders the content.
Creating your own protected routes
You can protect any route by wrapping it with ProtectedRoute. For example, to
protect a /dashboard route:
// src/app/dashboard/page.tsximport { ProtectedRoute } from "@/components/auth/protected-route";export default function DashboardPage() {return (<ProtectedRoute><div>Your protected content here</div></ProtectedRoute>);}
The component handles all the authentication checks. You don't need to write redirect logic yourself.
You can also provide a custom fallback:
<ProtectedRoute fallback={<div>Custom "please sign in" message</div>}><YourContent /></ProtectedRoute>
The fallback renders instead of the default "Authentication Required" card. Use this if you want custom messaging or styling.
Understanding the loading state
The ProtectedRoute component shows a loading state while checking
authentication. This happens on the first render. The AuthProvider calls
supabase.auth.getSession() on mount. Until that completes, loading is true.
Without a loading state, unauthenticated users might briefly see protected content. The loading state prevents that flash. It's a better UX.
The loading state is a spinner in a card. It says "Loading..." and "Checking authentication status". It's centered on the screen. Once authentication is checked, it either redirects or shows the content.
Common issues with protected routes
Redirect loop
If you see a redirect loop, check that your home page doesn't redirect to a protected route. The home page should be accessible without authentication. If it's protected, you'll get stuck in a loop.
Loading state never ends
If the loading spinner never goes away, check the browser console. You might see
an error from Supabase. Make sure your .env.local file has the correct
Supabase credentials. The AuthProvider can't check sessions without valid
credentials.
Can't access protected route even when authenticated
If you're signed in but still get redirected, check the browser console. You might see an error about the session. Try signing out and signing back in. The session might be invalid or expired.
Protected route shows content but user is null
This shouldn't happen, but if it does, there's a race condition. The
ProtectedRoute checks user from useAuth. If the auth state updates after
the check, you might see content briefly. This is rare, but if you see it,
refresh the page.
Why this pattern works
The ProtectedRoute pattern is simple and reusable. Wrap any content you want
to protect. The component handles all the logic. It works with Next.js App
Router as a client component that can use hooks. For larger apps, you might want
middleware, but for most cases, this component is enough.
9. Conclusion
You've successfully set up a Solana application with wallet authentication using Supabase. You can now connect wallets, authenticate users, and protect routes.
Start building your features and customize the template to fit your needs. The template provides a solid foundation for Solana applications with wallet-based authentication.